Desserts
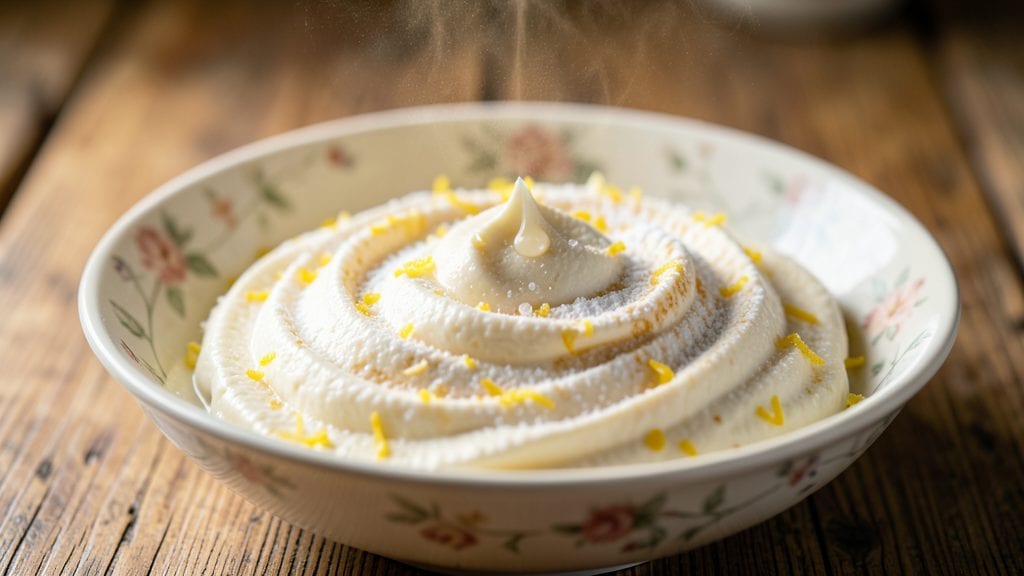
This Betty Crocker-inspired cream cheese frosting delivers the perfect balance of tangy cream cheese and sweet butter—smooth, spreadable, and foolproof for any dessert. ✨ The secret lies in precise measurements and a slow mixing technique that eliminates lumps while keeping the texture velvety.
I've tested this recipe countless times, and it never fails to impress with its rich, buttery swirls that stay stable on cakes or cupcakes.
The recipe uses simple ingredients you likely already have: cream cheese, butter, powdered sugar, and vanilla extract. What sets this frosting apart is the room-temperature prep—both cream cheese and butter should be soft but not melted to achieve that signature smooth consistency.
This version is also highly customizable; add lemon zest for brightness, chocolate chips for texture, or a hint of cinnamon for warmth.
What you'll end up with is a lighter-than-air frosting that spreads beautifully without being too sweet. The tang from the cream cheese cuts through the richness of the butter, creating a balanced flavor that works on everything from vanilla cakes to chocolate cupcakes.
It stays fresh in the fridge for up to a week, making it perfect for baking ahead or last-minute decorating.
Ready in just 10 minutes, this frosting is the ideal finishing touch for birthdays, holidays, or any celebration. The instructions are straightforward, and the results are consistently professional—no fancy equipment or advanced techniques required. Let's get started on creating your perfect swirls.
Ingredients for betty crocker cream cheese frosting
Simple ingredients that transform into velvety swirls—no lumps, no fuss, just perfect frosting.
| Ingredient | Amount | Notes |
|---|---|---|
| Cream Cheese 🧀 | 8 oz | Room temperature, full-fat preferred |
| Unsalted Butter 🧈 | ½ cup | Room temperature, European-style preferred |
| Powdered Sugar 🍚 | 3 cups | Sifted for smooth texture |
| Pure Vanilla Extract 🍯 | 1 tbsp | Bottled or seedless preferred |
| Lemon Zest 🍋 | 1 tsp | Optional for brightness |
| Fine Sea Salt 🧂 | ¼ tsp | Adjusts tanginess |
| Heavy Whipping Cream 🥛 | ¼ cup | Cold, for extra fluffiness |
The cream cheese is your foundation—full-fat Philadelphia or similar is ideal, and it must be room temperature (not melted). I grab mine from the deli counter when possible, as block cheese stays fresher longer. For butter, Plugra European-style or high-fat content (82%+) makes all the difference—it creates that signature buttery richness without overpowering. The powdered sugar? Domino or C&H are my go-tos; they're sifted and consistent. Pro tip: if your kitchen's humid, let the powdered sugar sit in the freezer for 10 minutes before measuring—it packs more evenly.
No heavy whipping cream? Whipped cream at full stiffness works in a pinch, though it adds a slightly lighter texture. Swapping vanilla extract? Almond extract at half the amount gives a sophisticated twist, while imitation vanilla can taste artificial. The lemon zest is optional but worth it—organic lemons from the grocery store's produce section yield the most vibrant flavor. For a chocolate twist, fold in 1/4 cup melted dark chocolate chips at the end. And if you're short on powdered sugar, confectioners' sugar is a direct swap, though it may be slightly grainier.
This frosting stays fresh in the fridge for up to 1 week, sealed tightly between uses. For longer storage, freeze portions in airtight containers for 3 months—thaw at room temperature before whipping. To keep it smooth, avoid refrigerating longer than necessary. I always make a double batch: one for immediate use, one to freeze for last-minute decorating. And if it starts to stiffen? A quick zap in the microwave (10-second bursts) brings it back to perfection.
Why You'll Love This Recipe
- Four-Beat Mixer Magic: I swear by this recipe—just beat the softened cream cheese and butter until smooth, then fold in that powdered sugar. No piping bags, no stress, and zero guesswork about texture.
- Bright Tang Twist: That lemon zest? Chef’s kiss. It cuts through the richness of the cream cheese and butter, giving it this bright, almost citrusy lift that makes it taste like a bakery secret.
- Cake & Cookie Swiss Army: Slather it on vanilla cake, swirl it into cupcakes, or dollop it over brownies—it’s my go-to for anything that needs that velvety, slightly tangy finish. Honestly, I’ve even used it as a filling for thumbprint cookies.
- Make-Ahead Dream: Between us, this frosting keeps beautifully in the fridge for up to a week. Whip up a big batch for birthdays, then just grab and go when you need it—no last-minute scrambling. (Yes, even on a Tuesday night.)
Step-by-step instructions for Betty Crocker cream cheese frosting
This foolproof method delivers silky-smooth swirls with perfect buttercream texture every time.
👨🍳 Step 1: Whip Cream Cheese Until Ultra-Smooth
In a stand mixer fitted with the paddle attachment, beat the 8 oz cream cheese on medium speed for 2-3 minutes until completely smooth and free of lumps. Here's the thing—room temperature cream cheese is non-negotiable. If it's still cold, it'll seize up and create grainy texture. I like to microwave it for 10-15 seconds (just until soft) if it's straight from the fridge.
Watch for that moment when it transforms from chunky to velvety. You'll notice the mixture thickens slightly as it emulsifies. This is your signal to move to the next ingredient—don't overmix or you'll develop gluten and make it tough.
🍳 Step 2: Incorporate Butter for Ultimate Richness
Add the 0.5 cup unsalted butter (still room temperature) and mix on medium-high speed for 2-3 minutes until fully combined and fluffy. European-style butter works best here because it has a higher fat content that creates that signature buttery smoothness. You'll see the mixture lighten in color as the butter incorporates completely.
This is where the magic happens—those fat molecules create air pockets that give frosting its signature lightness. If you see any butter clumps resisting, slow down to low speed and let it incorporate gradually. Patience here prevents greasy texture later.
⏰ Step 3: Gradually Add Powdered Sugar
With the mixer running on low speed, gradually add the 3 cups powdered sugar (sifted for smooth texture) over 2-3 minutes. This gradual addition prevents sugar shock that can make the frosting grainy. You'll notice the mixture thicken dramatically as the sugar dissolves into the fat base.
I like to stop occasionally and use a rubber spatula to scrape down the sides of the bowl—this ensures even distribution. The frosting should now be thick but still pipeable. If it's too stiff, we'll fix that in the next step. Don't worry if it looks curdled at first—the heavy cream will smooth it out.
🥘 Step 4: Add Flavorings and Heavy Cream
Mix in the 1 tbsp pure vanilla extract, 1 tsp lemon zest, and 0.25 tsp fine sea salt on low speed until fully incorporated. The lemon zest adds a bright, citrusy note that cuts through the richness, while the salt enhances all the flavors. Give it a taste at this point—you should detect vanilla sweetness with a hint of citrus tang.
Add the 0.25 cup cold heavy whipping cream and mix on medium speed for 1-2 minutes until light and fluffy. This final ingredient adds airiness and helps create that perfect swirlable consistency. The frosting should now be smooth, glossy, and hold its shape when piped. If it's still too thick, add 1 tsp milk (not in ingredients list—use this only if needed) at a time until it reaches your desired consistency.
🔪 Step 5: Pipe and Swirl for Decorative Perfection
Transfer the frosting to a piping bag fitted with a star tip. For classic swirls, pipe diagonal lines across a cake, then use the tip of a knife to gently pull the frosting toward you to create soft peaks. Work quickly but carefully—this frosting sets up fast once exposed to air.
For extra drama, pipe a border first, then fill the center and swirl. The secret to beautiful swirls is using a steady hand and keeping the piping bag at a slight angle. If the frosting starts to stiffen in the bag, dip the tip in warm water for 2-3 seconds to soften it slightly. Your finished frosting should be smooth, glossy, and ready to impress!
Pro Tips For Making Betty Crocker Cream Cheese Frosting
- SOFTEN CREAM CHEESE FIRST: Take the cream cheese out of the fridge 30 minutes before mixing—this prevents lumps when it hits the butter. I learned this the hard way after scraping gummy chunks out of frosting for the third time. If you’re in a rush, microwave it for 10 seconds (yes, even if it sounds scary), then let it cool slightly before mixing.
- USE ROOM-TEMP BUTTER: Unsalted butter straight from the fridge won’t blend smoothly—it’ll turn the frosting grainy. Let it sit out for 20 minutes or microwave for 5 seconds to soften. Trust me, your frosting will be silky instead of fighting you every stroke.
- SIFT THE SUGAR: Dump powdered sugar straight into the bowl, and you’ll end up with clumps no amount of beating will fix. Sift it first, especially if you’re using a boxed mix—this keeps the texture light and fluffy. (And yes, even if you’re lazy like me, it makes a real difference.)
- ADD VANILLA LAST: Mixing vanilla extract in early can mute its flavor as the frosting warms. Save it for the final beat—this way, every spoonful gets that bright, fresh vanilla punch. Lemon zest goes in too, but fold it gently at the end so it doesn’t overpower.
Common mistakes when making this dish
Cold Ingredients
The biggest downfall is using cold cream cheese or butter straight from the fridge. When these ingredients are chilled, they create lumps that won't dissolve, no matter how long you mix. I've seen this happen when people rush and skip the room-temperature prep.
The fix? Let cream cheese sit at room temperature for 1-2 hours or microwave it for 10-15 seconds (just until soft). Butter should be pliable but not melted—press your finger into it; if it leaves a dent but doesn't smear, it's ready. 🧀
Overmixing the Sugar
Dumping all the powdered sugar at once and mixing at high speed creates a grainy, sandy texture. The sugar molecules need time to dissolve gradually into the fat base.
I've learned this the hard way—once I accidentally mixed on high for 5 minutes straight, and the frosting turned into a dry, crumbly mess. Instead, add sugar slowly over 2-3 minutes on low speed while scraping the bowl often. This ensures a silky finish every time. 🍚
Skipping the Heavy Cream
Some recipes omit the heavy whipping cream, but this is a game-changer for texture. Without it, the frosting becomes dense and heavy. The cream adds airiness and lightness that makes the frosting perfect for piping.
I once made a batch without it, and while it tasted great, it was too stiff to create those beautiful swirls. Add the cold cream at the very end—it whips into the mixture and creates that signature fluffiness. 🥛
Incorrect Mixer Speed
Using high speed for the entire process can cause the frosting to separate or develop a greasy texture. The cream cheese and butter need to be incorporated gently at first, then gradually built up.
I recommend starting on medium speed for the cream cheese, then medium-high for the butter, and finally low speed for the sugar. This gradual approach prevents overheating the fats and keeps the texture smooth. ⚡
Not Tasting During Mixing
Many people skip tasting the frosting until the very end, only to realize it's either too sweet or bland. I always taste after adding the vanilla and lemon zest to check the balance. If it needs more sweetness, add 1 tbsp powdered sugar at a time.
For tang, a pinch more salt or a splash of lemon juice helps. This simple step saves time and ensures the perfect flavor every time. 💡
Storing Improperly
Leaving frosting at room temperature for too long causes it to spoil quickly. I've seen people leave it out overnight, only to find it separated or developed an off smell. Always store it in an airtight container in the fridge for up to 1 week.
For longer storage, freeze portions in airtight containers for 3 months. When reheating, microwave in 10-second bursts and whisk until smooth. Never leave it out for more than 2 hours. ❄️
Nutrition facts
Frequently asked questions
Why does my cream cheese frosting turn grainy?
Graininess usually happens when cold cream cheese or butter creates undissolved lumps. Always use ingredients at room temperature—press your finger into the butter; it should dent but not smear. For cream cheese, microwave for 10-15 seconds if needed. Also, add powdered sugar gradually on low speed to prevent sugar shock.
Can I make this frosting without a mixer?
Use a hand mixer or even a sturdy whisk. Beat the cream cheese and butter together until smooth, then gradually fold in the powdered sugar with a spatula. For extra fluffiness, whip the heavy cream separately and fold it in at the end. The texture will be slightly less airy but still delicious.
How do I adjust the sweetness for kids vs. adults?
Start with the 3 cups powdered sugar as written, then taste. For kids, add 1-2 tbsp more sugar at a time until it's sweet enough. For adults, reduce sugar by 1/4 cup and enhance flavor with extra vanilla or lemon zest. A pinch of salt balances sweetness beautifully.
What's the best way to pipe perfect swirls?
Use a piping bag with a star tip (Wilton 1M or similar). Pipe diagonal lines across the cake, then gently drag a knife through the frosting toward you to create soft peaks. Work quickly—the frosting sets fast! For extra smoothness, chill the frosting for 15 minutes before piping.
Can I color this frosting without changing the flavor?
Yes! Use gel food coloring (liquid can make it too runny). Start with 1/2 tsp and mix well, adding more gradually. For pastel shades, use 1/4 tsp of a single color. Avoid citrus-based colorings—they may alter the lemon zest flavor.