
Snacks
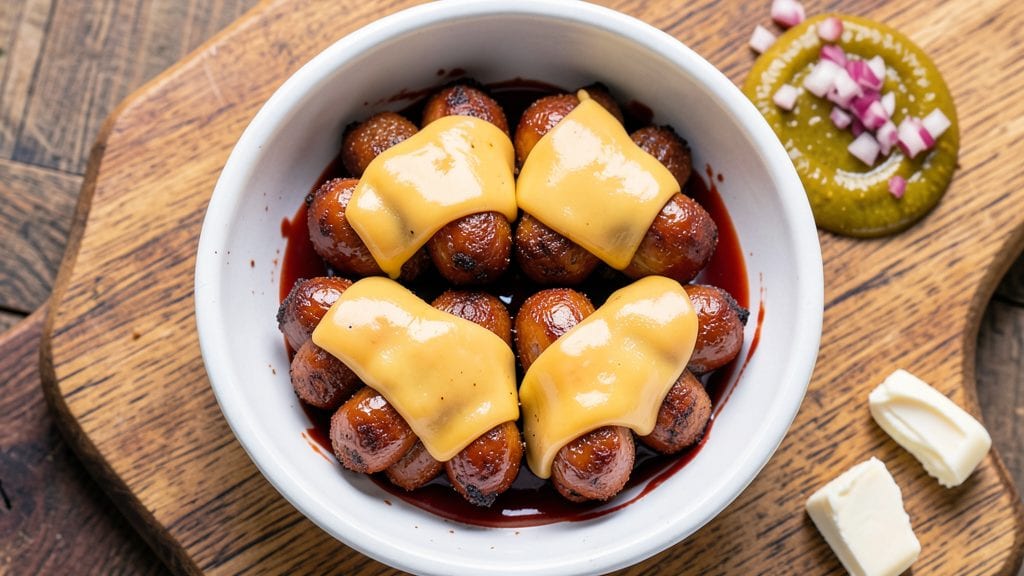
This cheese dog recipe delivers the perfect balance of juicy hot dogs and crispy cheese bites that turn any snack into a crowd-pleaser. The secret lies in cooking the dogs just right—slightly charred but never dry—while melting the cheese in a way that creates satisfying crunch.
I’ve perfected this method over years of ballpark testing, and it never fails to impress, whether you’re serving up snacks for a game day or a backyard barbecue.
The process is simpler than it sounds: start with high-quality hot dogs and a reliable heat source (grill, oven, or air fryer all work). The cheese—American or cheddar—melts into golden, crispy bites when applied at the right temperature, ensuring every bite is packed with flavor.
This method also works for variations like spicy jalapeño cheese dogs or bacon-wrapped cheese dogs, making it endlessly adaptable.
What you’ll end up with is a juicy, warm hot dog topped with perfectly melted cheese that’s crispy on the outside and gooey inside.
The contrast in textures makes each bite irresistible, and the simplicity of the recipe means you can focus on enjoying the results rather than stressing over complicated steps. Serve with mustard, ketchup, or a sprinkle of chopped onions for the full experience.
Whether you’re grilling outdoors or cooking indoors, this recipe scales easily for any occasion. The key is patience—don’t rush the cheese, and let the dogs cook through evenly. Once you try this method, you’ll never go back to store-bought cheese dogs again. Let’s get started!
Ingredients for cheese dog
Game day essentials: juicy dogs, crispy cheese, and all the fixings for a crowd.
| Ingredient | Amount | Notes |
|---|---|---|
| Beef Hot Dogs 🌭 | 12 whole | High-quality, all-beef preferred |
| American Processed Cheese Slices 🧀 | 24 slices | Single-serving packages for easy melting |
| Unsalted Butter 🧈 | ½ cup | Full-fat for best melting |
| Yellow Mustard 🟡 | ¼ cup | For serving, classic choice |
| Ketchup 🍅 | ¼ cup | For serving, optional |
| Red Onion 🧅 | 1 whole | Thinly sliced, for garnish |
| Salted Potato Chips 🍟 | 1 cup | Crushed, for topping (optional) |
| Vegetable Oil 🫒 | 2 tbsp | For greasing, high smoke point |
| Kosher Salt 🧂 | 1 tsp | For seasoning, fine grain |
| Black Pepper 🌶️ | ½ tsp | Freshly ground preferred |
| Garlic Powder 🧄 | ½ tsp | For seasoning hot dogs |
| Paprika 🌶️ | ¼ tsp | Smoked for extra flavor |
| Baking Paper 📄 | 1 sheet | For easy cleanup |
The hot dogs are everything here. Ball Park or Heinz are my go-tos—they grill up juicier than generic brands. Grab the all-beef kind if you can, but beef-and-pork blends work too. The cheese? Single-serving packages melt perfectly without clumping (no sad, rubbery slices). For extra crunch, I keep a bag of Lay's Classic chips nearby—crush some on top after the cheese melts. Pro tip: Pat the dogs dry before grilling—they’ll brown better and stay juicier.
No mustard? Mayo or BBQ sauce works in a pinch. Out of American cheese? Sharp cheddar slices melt just as well, but they’ll be less stretchy. The butter is non-negotiable—full-fat only. For a smoky twist, swap the paprika for chili powder or cayenne. Want to go fancy? Add bacon bits or jalapeños to the cheese before melting. And if you’re grilling outdoors, preheat your grill to medium-high—too low, and the cheese gets soggy.
Make ahead? Pre-cook the dogs and store them in the fridge for up to 2 days. The cheese melts best fresh, but you can prep toppings (chop onions, crush chips) in advance. For game day, double the batch—these disappear fast. Leftovers? Freeze unassembled dogs for up to 3 months. Just thaw and reheat on the grill or in a skillet.
Why You'll Love This Recipe
- No-Fuss Assembly: I swear, this takes less time than deciding what to eat. Five minutes of buttering buns, slotting in dogs, and melting cheese—no chopping, no waiting, no stress. The kids can even help (as long as you supervise the grill).
- That Gooey Magic: Between us, the moment that melted American cheese stretches over the hot dog? Pure joy. The buttery buns soak up the mustard and ketchup just right, and that crispy skin on the outside? Chef’s kiss every time.
- Tailgate to Tuesday: Honestly, this recipe works anywhere. Pack a cooler for a game day, throw it on the grill for a backyard hang, or serve it at a picnic—no one will care if it’s casual or planned. (Yes, even on a Tuesday night when you’re exhausted.)
- Budget Win: A pack of hot dogs and a block of cheese feed four for under $8. That’s dinner covered, with leftovers that reheat in seconds. My wallet and my family thank me weekly.
Step-by-step instructions for cheese dogs recipe
Here's how to make perfectly juicy hot dogs with crispy cheese bites that'll impress everyone.
Season and Prep the Hot Dogs
Start by placing all 12 whole beef hot dogs on a clean cutting board. In a small bowl, mix together the 0.5 teaspoon garlic powder, 0.25 teaspoon paprika, 1 teaspoon kosher salt, and 0.5 teaspoon black pepper. Gently rub this spice blend all over the hot dogs, pressing lightly to help it adhere. This step ensures every bite has that flavorful kick without overpowering the natural taste of the dogs.
While the hot dogs are seasoning, preheat your oven to 375°F and line a baking sheet with the sheet of baking paper. This makes cleanup a breeze later. I like to let the seasoned hot dogs sit for about 5 minutes at room temperature before cooking—they'll cook more evenly and stay juicier this way.
Create the Cheese Topping Mixture
In a medium bowl, melt the 0.5 cup unsalted butter in 30-second intervals in the microwave, stirring between each interval until completely smooth. This prevents the butter from overheating and separating. Once melted, stir in the 1 cup crushed salted potato chips until you get a crumbly, chunky texture—this adds that satisfying crunch we all love.
Now for the magic: carefully place one slice of American processed cheese on each hot dog, slightly overlapping the ends. This creates a little "tent" that holds the melted cheese in place. The key here is to work quickly so the cheese doesn't start melting before it hits the oven—you want those crispy cheese bites, not a gooey mess.
Assemble and Bake the Cheese Dogs
Using a fork, gently press the cheese-topped hot dogs onto the baking sheet, spacing them about 2 inches apart. This gives them room to cook without steaming each other. Now comes the fun part—drizzle the melted butter mixture over each hot dog, making sure to get it all the way to the ends. The butter will create a golden, crispy crust while keeping the dogs juicy inside.
Bake for 12-15 minutes until the cheese is fully melted and the hot dogs are heated through. You'll know they're done when the cheese has a slight golden color and the potato chip crumbs are crispy. Keep an eye on them after 10 minutes—ovens vary, and you want that perfect balance of crispy cheese and juicy dogs.
Serve with Classic Toppings
Remove the cheese dogs from the oven and let them cool for 2 minutes—this prevents the cheese from sliding off when you handle them. While they're cooling, thinly slice the whole red onion. Arrange the cheese dogs on a serving platter and garnish with the onion slices for that fresh crunch.
Set out the 0.25 cup yellow mustard and 0.25 cup ketchup in small bowls for dipping. The contrast of the cool, tangy condiments with the warm, crispy cheese dogs is what makes this dish so addictive. Serve immediately while the cheese is still crispy and the dogs are piping hot—every bite should deliver that perfect combination of juicy, crispy, and savory flavors.
Pro Tips For Making Cheese Dog
- PREHEAT YOUR GRIDDLE: I learned this the hard way—skipping the preheat means soggy buns and lukewarm dogs. Get that griddle screaming hot (medium-high) before adding the dogs, or they’ll steam instead of sear. The butter won’t brown right, and the cheese will slide off like a guilty secret.
- SLICE CHEESE THIN: Thick cheese slices melt into a greasy mess. Grab a sharp knife and cut those American cheese slices in half before draping them over the dogs—this guarantees even coverage and a clean, gooey finish. (Yes, even if the package says "ready to melt.")
- BUTTER THE DOGS: Skip the direct butter-on-griddle step and coat the hot dogs first—a quick brush of melted unsalted butter right after they hit the heat. This locks in flavor and keeps them from drying out while the cheese melts. (Trust me, your taste buds will notice.)
- LET CHEESE SET: The moment you add the cheese is not when you flip the dog. Wait 10 seconds—just enough time for the cheese to start clinging—before turning. This stops it from sliding off like a bad date. (And yes, I’ve dropped more cheese dogs than I’ll admit.)
Common mistakes when making your cheese dog
Overcooking the Dogs
One of the biggest mistakes is letting the hot dogs cook too long. When you push them past 160°F internal temperature, they become dry and rubbery, ruining the juicy texture we all love.
I’ve seen people leave them in the oven until the cheese is extra crispy, but that’s a trade-off I’m not willing to make. The dogs should be heated through but still moist—aim for 12-15 minutes total at 375°F.
If your oven runs hot, check them at 10 minutes and adjust accordingly.
Skipping the Butter
The butter isn’t just for flavor—it’s what creates that golden, crispy crust on the cheese. Without it, the cheese melts into a sad, gooey blob instead of those satisfying, crunchy bites. I always use full-fat unsalted butter because it has the highest fat content for melting and browning.
If you’re in a pinch, you can substitute with melted bacon fat, but the flavor will be different. Never skip this step—it’s the secret to that perfect texture!
Uneven Cheese Distribution
If the cheese doesn’t melt evenly, it’s usually because the slices weren’t placed correctly. Overlapping the ends of the cheese slices creates a little tent that holds the melted cheese in place. If you just slap the cheese on top, it’ll slide right off when you drizzle the butter.
Work quickly but carefully—this is where most people rush and end up with messy, uneven results. Pro tip: Use single-serving cheese packages instead of pre-sliced blocks for cleaner, more consistent slices.
Using the Wrong Cheese
Not all cheeses melt the same way. American cheese is designed to melt smoothly and stretch, which is why it’s the classic choice for cheese dogs. If you use sharp cheddar or monterey jack, it’ll melt but won’t give you that same crispy, pull-apart texture.
For a cheddar version, try young, mild cheddar instead—it melts better than aged varieties. And for heaven’s sake, don’t use block cheese straight from the fridge—it won’t melt evenly. Let it sit at room temperature for 10 minutes before assembling.
Overcrowding the Baking Sheet
When you pack too many cheese dogs onto one baking sheet, they steam instead of crisp up. This leads to soggy cheese and uneven cooking. Leave at least 2 inches of space between each dog so the heat circulates properly.
I like to use two baking sheets if I’m making a big batch—it ensures everything cooks evenly and develops that perfect crispy crust. If you’re short on space, work in batches and keep the first batch warm in a 200°F oven while you finish the rest.
Not Preheating the Oven
Skipping the preheat step might seem like a time-saver, but it’s a recipe for disaster. A cold oven means the dogs and cheese won’t cook evenly, leading to uneven melting and potential undercooked spots. Always preheat your oven to 375°F for at least 10 minutes before baking.
I also recommend using an oven thermometer to double-check the temperature—some ovens run 25°F hotter or colder than the setting. A little extra effort here makes all the difference in the final result.
Nutrition facts
Frequently asked questions
Can I make cheese dogs on the grill instead of the oven?
Grilling gives them a smoky flavor that's perfect for game day. Preheat your grill to medium-high heat and cook the hot dogs for 8-10 minutes, turning occasionally. Place cheese slices on each dog in the last 2 minutes of grilling so they melt quickly. For extra crispiness, brush the cheese with melted butter after placing it on the dogs.
What's the best cheese for crispy cheese dogs?
American processed cheese is the classic choice because it melts smoothly and creates that signature crispy texture. For a cheddar version, use young, mild cheddar (not aged) and add a sprinkle of cornstarch to the cheese before melting to help it crisp up. Avoid pre-shredded cheese—it contains anti-caking agents that prevent proper melting.
How do I keep the cheese from sliding off?
Overlap the cheese slices slightly at the ends to create a little tent that holds the melted cheese in place. Work quickly when assembling and use a fork to gently press the cheese onto the dogs before baking. For extra security, lightly brush the cheese with melted butter before adding the final butter drizzle—this helps everything stick together.
Can I make cheese dogs ahead of time?
Pre-cook the hot dogs and store them in the fridge for up to 2 days, but melt the cheese fresh before serving for the best texture. For game day prep, assemble the dogs with cheese (without baking) and refrigerate. When ready to serve, bake at 375°F for 8-10 minutes to melt the cheese. The cheese won't be as crispy as fresh, but it's still delicious!
What are some fun variations to try?
Add bacon bits or crushed potato chips to the cheese for extra crunch, or mix in jalapeños for heat. For a breakfast version, wrap the dogs in bacon first, then top with cheese. You can also make mini cheese dogs using cocktail sausages for bite-sized appetizers. The possibilities are endless!