Sauces & Condiments
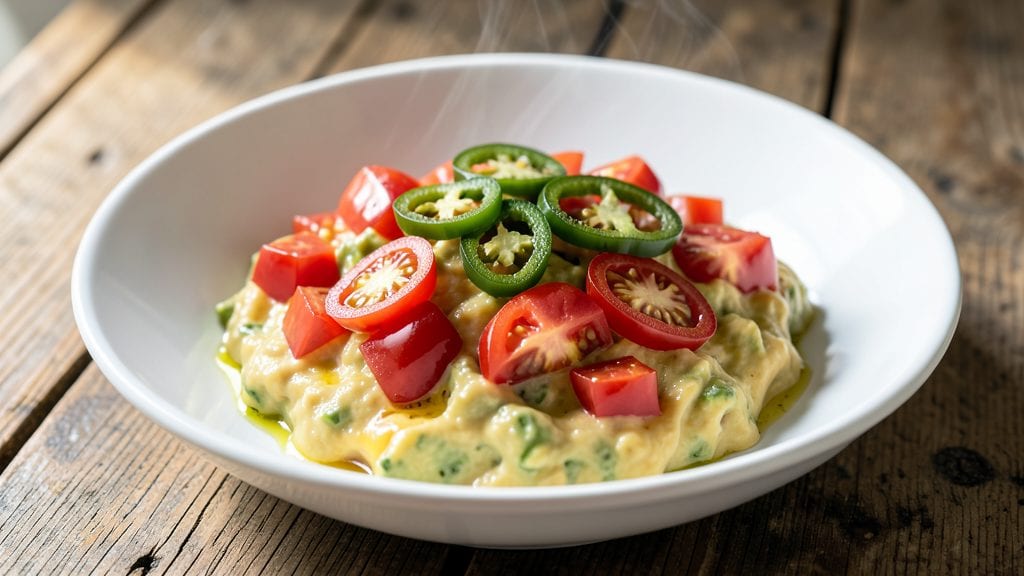
This cheese salsa recipe transforms simple pantry staples into a velvety-spiced dip with a crispy, cheesy crown that begs for seconds. The secret lies in blending creamy avocado and melted cheese with fresh tomatoes and jalapeños, then topping it with a layer of toasted cheese that crisps to golden perfection.
I developed this version after testing countless batches—this one delivers that perfect balance of tangy, creamy, and slightly spicy in every bite.
The beauty of this recipe is its versatility—it works as a dip for tortilla chips, a topping for baked potatoes or tacos, or even a side for grilled meats.
With just 10 minutes of prep time and 5 ingredients (plus a few pantry staples), you’ll have a dip that tastes homemade but requires no special skills. The key is letting the cheese melt into the salsa base while keeping the texture light and spreadable.
What makes this cheese salsa truly special is that creamy texture—thanks to avocado and blended cheese—that stays cohesive without being heavy. The crispy cheese topping adds a satisfying crunch that contrasts beautifully with the smooth base.
Once you try this version, you’ll never go back to store-bought again. Let’s get started!
This dip keeps well in the refrigerator for up to 5 days, though the crispy topping is best enjoyed fresh. For extra flavor, add a sprinkle of smoked paprika or fresh cilantro before serving.
It’s the perfect crowd-pleaser for game day, parties, or whenever you crave something rich, creamy, and impossible to resist.
Ingredients for cheese salsa
Five core ingredients plus pantry staples—this is your cheesy salsa game-changer.
| Ingredient | Amount | Notes |
|---|---|---|
| Ripe Avocados 🥑 | 2 whole | Pitted, scooped into bowl |
| Cheddar Cheese 🧀 | 1 cup | Shredded, sharp variety preferred |
| Monterey Jack Cheese 🧀 | ½ cup | Shredded, mild and creamy |
| Medium Roma Tomatoes 🍅 | 2 whole | Diced, seeds removed |
| Fresh Jalapeños 🌶️ | 2 whole | Seeds removed, finely chopped |
| Extra-Virgin Olive Oil 🫒 | ¼ cup | For blending and crispy topping |
| Fresh Cilantro 🌿 | ¼ cup | Chopped, stems removed |
| Lime Juice 🍋 | 2 tbsp | Freshly squeezed |
| Salt 🧂 | ½ tsp | Kosher or sea salt |
| Ground Black Pepper 🌶️ | ¼ tsp | Freshly ground preferred |
Avocados are non-negotiable here—Hass is your best bet, and they should be ripe but firm. Trader Joe's always has great ones, or check the produce section for ones that yield slightly when gently squeezed. The cheeses? Sharp cheddar brings the tang, while Monterey Jack keeps it creamy. If you can't find sharp cheddar, Pepper Jack works too. For tomatoes, Roma are ideal—they're meaty and hold up well when diced. Skip the canned stuff; fresh is absolutely essential for that bright, fresh flavor. The jalapeños can be mild or hot, but remove all seeds if you want to keep it subtle.
No avocados? Greek yogurt or sour cream can mimic the creaminess, though it won't be quite the same. Swap Monterey Jack for Colby or mild cheddar if that's what you've got. Fresh cilantro? Dried works in a pinch, but use half the amount. Lime juice? Lemon juice is a decent substitute, but the flavor won't be identical. The olive oil is key for blending and crisping the topping—don't skimp on quality. If you're short on time, pre-shredded cheese is fine, but freshly grated melts better and tastes richer. For extra heat, add a pinch of cayenne or smoked paprika to the base.
This salsa tastes even better the next day—up to 5 days in the fridge, stored in an airtight container with a layer of plastic wrap pressed right on top to keep it fresh. The crispy cheese topping? Best served fresh, but you can reheat portions in the oven at 350°F for 3-5 minutes to restore the crunch. Double the batch—it disappears fast. I always make extra to toss into scrambled eggs or use as a taco topping. Freezes beautifully for up to 3 months if you want to prep ahead for game day.
Why You'll Love This Recipe
- Five-Ingredient Magic: I swear by this combo—ripe avocados for creaminess, sharp cheddar and melty Monterey Jack for that cheese pull factor, and Roma tomatoes that actually hold their shape. No blender, no fancy techniques, just chop and mix while you wait for the tortilla chips to toast.
- Creamy Heat Balance: Between us, the jalapeños here aren’t just for spice—they bring this bright, fresh kick that cuts through the richness. Honestly, the first time I added them, my husband asked for seconds before I even finished stirring. That’s when I knew it was spot-on.
- Game for Any Meal: This isn’t just a snack—it’s my go-to for tacos, quesadilla dips, or even a quick breakfast scramble (yes, really). I’ll keep it in the fridge all week, tossing it into grain bowls or using it to jazz up eggs. The cheese keeps it satisfying, no matter the occasion.
- No-Waste Win: Avocados get used up before they brown, tomatoes don’t go bad sitting in the fridge, and that leftover cheese? Perfect for next week’s batch. Between us, I’ve saved at least $15 a month by not buying pre-made salsa—this is cheaper, better, and zero guilt about leftovers.
Step-by-step instructions for creamy spiced dip with crunchy top Magic
Here's how to blend rich textures and bold flavors into this irresistible cheese salsa.
Prepare the Creamy Avocado Base
Cut the 2 whole ripe avocados in half, remove the pits, and scoop the flesh into a food processor. Add the 2 tablespoons lime juice immediately—this prevents browning and adds bright acidity. Pulse until completely smooth, scraping down the sides as needed. You want a perfectly creamy texture, not chunky.
Add the 0.5 teaspoon salt and 0.25 teaspoon ground black pepper to the avocado mixture. Pulse again just until combined. The salt enhances all flavors while the pepper adds subtle heat. Taste at this stage—it should be perfectly balanced, with no bitterness from the avocado.
Blend in Cheeses and Fresh Ingredients
Add the 1 cup shredded cheddar cheese and 0.5 cup shredded Monterey Jack cheese to the food processor. Pulse until fully incorporated, stopping occasionally to scrape down the sides. The cheeses should melt into the avocado, creating a velvety blend.
Next, add the diced 2 medium roma tomatoes and finely chopped 2 fresh jalapeños (seeds removed for mild heat). Pulse just 2-3 times until everything is combined but still slightly textured. You want visible flecks of tomato and jalapeño for visual appeal and bite. Add the 0.25 cup chopped fresh cilantro and pulse once more to distribute evenly.
Create the Crunchy Topping
In a small bowl, combine 2 tablespoons of the 0.25 cup extra-virgin olive oil with 1 tablespoon of the shredded cheddar cheese. Mix until the cheese is evenly coated with oil. Spread this mixture evenly over the cheese salsa in your serving dish.
Place the dish under a broiler for 2-3 minutes until the cheese topping turns golden brown and crispy. Watch closely—it should only take minutes to achieve that perfect toasted look. The broiler creates a delightful contrast to the creamy base, adding both texture and visual appeal.
Chill and Serve
Let the cheese salsa chill in the refrigerator for at least 30 minutes before serving. This allows all the flavors to meld together beautifully. The chilling time also helps the textures separate slightly, giving you that perfect creamy base with crispy topping.
Serve immediately with tortilla chips or as a dip with fresh vegetables. The contrast of creamy, cheesy goodness with the crispy topping and fresh vegetables makes this dip absolutely irresistible. Each bite delivers rich avocado, sharp cheddar, and a hint of spicy jalapeño—all perfectly balanced.
Pro Tips For Making Cheese Salsa
- CHOP CHEESE SMALL: I learned this the hard way—big chunks of cheddar and Monterey Jack make the salsa look messy. Dice the cheese into 1/4-inch pieces so it melts evenly and blends into the texture without clumping. (Yes, it takes 2 minutes extra, but the result is smoother.)
- SALT THE TOMATOES: Toss the diced Roma tomatoes with a pinch of salt and let them sit for 5 minutes before mixing. This draws out moisture, preventing a watery salsa later—especially if your tomatoes are juicy.
- MASH AVOCADOS FIRST: Skip the knife and smash the avocados with a fork before adding other ingredients. This creates a creamier base right away, so the salsa doesn’t turn grainy when you mix in the cheese and tomatoes.
- COOK JALAPEÑOS: Char the jalapeños over a gas flame (or under a broiler) for 30 seconds per side before dicing. The smoky depth makes the salsa taste more complex than raw peppers ever could—worth the extra step.
Essential equipment for perfect results
Food Processor Must-Have
Your food processor is the MVP for this recipe—it blends the avocado and cheese into that dreamy, velvety texture. I use a Cuisinart DLC-4A because it handles soft ingredients like avocado without overheating. If you're on a budget, a Ninja BN601 works just as well.
For the crispy topping, a small mixing bowl (like the OXO Good Grips) helps evenly coat the cheese in olive oil. 💡
Broiler Setup
Broiling the cheese topping requires a light-colored metal baking sheet (I use Wilton nonstick) to reflect heat evenly. Position the rack 3-4 inches from the broiler element for even browning.
A heat-resistant glove is essential—this step happens fast, and you don’t want to risk burns. Keep a spray bottle with water nearby to quickly extinguish any flare-ups from the oil.
Cheese Tools
For the best results, invest in a box grater (like the Microplane) to shred your cheddar and Monterey Jack—it melts more evenly than pre-shredded cheese. A mandoline slicer (set to 1/8-inch thickness) works wonders for the crispy topping if you prefer uniform slices.
I also keep a small offset spatula handy to spread the cheese mixture evenly before broiling.
Serving Essentials
A wide-mouth glass bowl (like Pyrex) is perfect for serving—it keeps the salsa chilled while showcasing the crispy topping. For dipping, a ceramic chip dish (such as Corelle) elevates presentation.
If you’re serving outdoors, a cooling rack underneath prevents soggy chips. Don’t forget a lime wedge and extra jalapeños on the side for customization! 🍽️
Storage Containers
For leftovers, use glass airtight containers (like Le Creuset or Rubbermaid) to maintain freshness. If storing the crispy topping separately, wrap it in parchment paper and reheat in the oven at 350°F for 3-5 minutes to restore crunch.
A small whisk comes in handy for stirring the base if it separates while refrigerated.
Nutrition facts
Frequently asked questions
Can I make this cheese salsa without avocado?
Yes! For a similar creamy texture, substitute with ½ cup Greek yogurt or sour cream. The flavor won't be identical, but it'll still be rich and dip-worthy. For extra creaminess, blend in 2 tablespoons mayo too. The key is keeping the base smooth to balance the crispy topping.
How do I prevent the cheese salsa from getting watery?
Drain any excess liquid from diced tomatoes and jalapeños before blending. Also, let the salsa chill for 30 minutes before serving—this helps the textures separate naturally. If it still looks too thin, stir in 1 tablespoon cornstarch mixed with water to thicken it.
What’s the best way to reheat leftover cheese salsa?
For the creamy base, warm in a microwave-safe bowl for 20-30 seconds and stir until smooth. To restore the crispy topping, sprinkle extra shredded cheese on top and broil for 2-3 minutes at 375°F. Never microwave the crispy topping—it’ll turn soggy!
Can I make this cheese salsa spicier?
Add ½ teaspoon cayenne powder or 1 extra jalapeño (seeds included) to the base. For heat lovers, top with chopped serrano peppers or a dash of hot sauce before serving. Always taste first—you can adjust heat levels as you go.
Why did my cheese topping turn oily instead of crispy?
This usually happens if the cheese wasn’t evenly coated with oil or the broiler was too far from the heat source. Next time, mix the cheese and oil thoroughly and position the rack 3-4 inches from the broiler element. Also, watch closely—it crisps in just 2-3 minutes!