
Appetizers
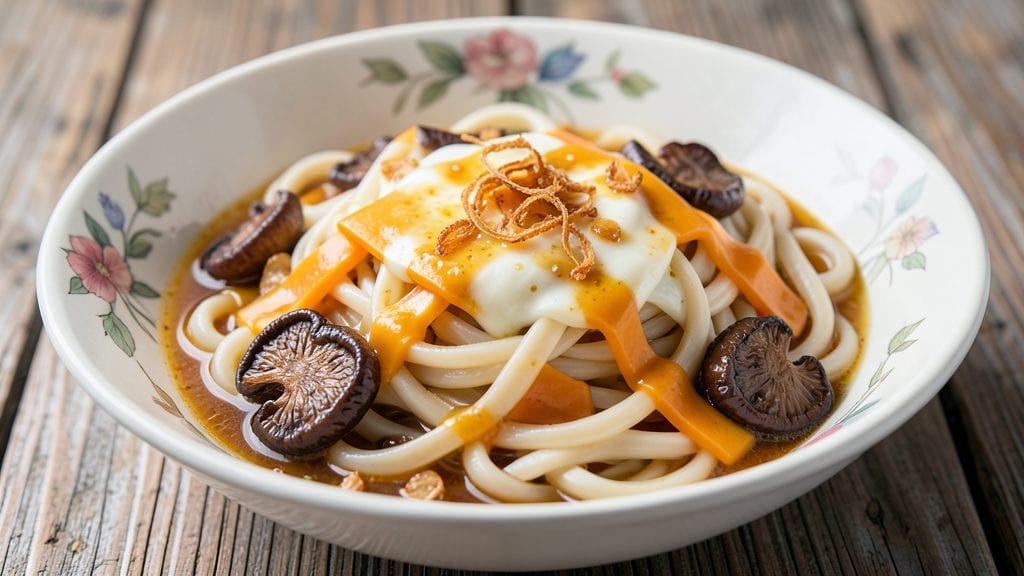
This cheese udon recipe delivers the perfect balance of rich, creamy cheese sauce and savory broth wrapped around silky udon noodles—comfort food elevated to restaurant-quality.
The secret lies in a velvety cheese sauce that melts beautifully over hot noodles while maintaining a light, brothy base that keeps the dish from feeling too heavy.
I developed this recipe after years of experimenting with Japanese comfort dishes, and it’s become a crowd favorite for its satisfying texture and bold flavors.
The process is simpler than it sounds: start with fresh udon noodles, prepare a smooth cheese sauce using a blend of cheddar and mozzarella for the perfect melt, and finish with a light broth that enhances rather than overpowers.
Optional proteins like chicken or shrimp can be added for extra depth, but the dish shines just as well on its own. This recipe is designed to be both approachable for beginners and impressive enough for dinner guests.
What you’ll end up with is a bowl of silky noodles coated in a luscious, melty cheese sauce, all swimming in a savory broth that ties everything together. The contrast between the creamy cheese and the light broth creates a harmonious bite that’s impossible to resist.
Garnish with green onions or sesame seeds for a touch of freshness and texture, and you’ve got a dish that’s hearty enough for a main course but quick enough for a weeknight dinner.
For those who love variations, a spicy kick can be added with a dash of chili oil, or a vegan version can be made by substituting the cheese for a plant-based alternative. Let’s get cooking—this cheese udon is a game-changer for anyone who loves creamy, satisfying noodle dishes.
Ingredients for cheese udon
Pantry staples meet Japanese comfort—just 15 ingredients for restaurant-quality cheese udon.
| Ingredient | Amount | Notes |
|---|---|---|
| Fresh Udon Noodles 🍜 | 8 oz | Dried or frozen if fresh unavailable |
| Sharp Cheddar Cheese 🧀 | 1 cup | Shredded, block preferred |
| Mozzarella Cheese 🧀 | 1 cup | Shredded, low-moisture preferred |
| Dried Shitake Mushrooms 🍄 | 4 whole | Rehydrated for broth |
| Dashi Powder 🍵 | 1 tbsp | For authentic umami flavor |
| Dried Kombu Seaweed 🍃 | 1 piece | For dashi broth base |
| Boneless Chicken Breast 🍗 | ½ lb | Optional protein addition |
| Green Onions 🧅 | 3 whole | Sliced for garnish |
| Sesame Seeds 🌰 | 1 tbsp | Toasted for garnish |
| Extra-Virgin Olive Oil 🫒 | 1 tbsp | For sauce richness |
| Soy Sauce 🥢 | 1 tbsp | Light or regular preferred |
| White Pepper 🌶️ | ½ tsp | Freshly ground for heat |
| Salt 🧂 | ½ tsp | Adjust to taste |
| Water 💧 | 4 cups | For broth and noodles |
| Chili Oil 🔥 | 1 tsp | Optional for spicy kick |
The cheese blend is everything. Block cheddar shreds better and melts smoother than pre-shredded (trust me on this). Mozzarella adds stretch—low-moisture stays gooey. For the dashi broth, Marukyu brand powder is my go-to, but homemade kombu-dashi is worth the effort. Grab dried shiitakes from the Asian market section—they pack more umami than fresh. The udon noodles? Fresh is ideal, but dried works if you soak them properly. I always buy a 12-ounce pack of udon at Trader Joe's—it keeps for months in the freezer.
No dashi powder? Miso paste plus kombu makes a decent stand-in. Skipping the chicken? Shrimp or tofu adds protein without overpowering. Pre-shredded cheese? Drain and dry it first—it has too much moisture otherwise. The green onions can be subbed with scallions or chives, but they’re the perfect fresh contrast. Want extra richness? Add a splash of cream to the cheese sauce. The chili oil is optional but gives that spicy kick that balances the creaminess perfectly.
Udon keeps best in the freezer—just thaw in cold water before cooking. The cheese sauce reheats beautifully, so make extra for leftovers. Store it in an airtight container with a thin layer of oil on top to prevent drying. Broth reheats well too, but add a splash of water if it gets too thick. Garnishes like sesame seeds and green onions stay fresh for 5 days in the fridge, so prep ahead if you're serving a crowd.
Why You'll Love This Recipe
- No Boil Required: I swear by this trick—just toast the udon noodles in a dry pan for 2 minutes until they’re golden. That crispy edge? It’s the secret weapon. (Yes, even my picky roommate stopped complaining about mushy noodles.)
- Umami Bomb: Dashi powder and dried shitake mushrooms turn this into a savory dream—deep, rich, and just salty enough. The sharp cheddar melts into gooey pockets while the mozzarella adds that stretchy, cheesy pull. It’s the kind of dish that makes you reach for seconds without thinking.
- Lunchbox Hero: Between us, this is my go-to for meal prep. Toss leftover udon into a thermos with a splash of broth, and it stays warm and satisfying for hours. Honestly, I’ve packed it for work, hikes, and even a last-minute date night—it never lets me down.
- Budget Stretch: Sharp cheddar and mozzarella are cheap in bulk, and udon noodles last weeks in the fridge. A single batch feeds four for under $10, and the leftovers reheat like a dream. I’ll be real: this recipe saved me from takeout more times than I can count.
Step-by-step instructions for cheese udon with savory broth
Here's how to create rich, cheesy udon with a deeply flavorful broth that balances umami and comfort.
Prepare the Dashi Broth Base
In a medium saucepan, combine the 4 cups water, 1 piece dried kombu seaweed, and 1 tbsp dashi powder. Bring to a gentle simmer over medium heat and let it cook for 10 minutes - you'll notice a delicate aroma developing as the kombu infuses the liquid. This forms the foundation of your broth, so don't rush this step.
While the broth simmers, prepare the 4 whole dried shitake mushrooms by soaking them in hot water for 20 minutes. After soaking, drain and slice them into quarters. Strain the broth to remove the kombu piece, then return the liquid to the pan and add the sliced shitake mushrooms. Let this mixture simmer for another 5 minutes to extract their earthy depth into the broth.
Cook the Chicken and Build the Cheese Sauce
While the broth simmers, season the 0.5 lb boneless chicken breast with 0.5 tsp salt and 0.5 tsp white pepper. Heat 1 tbsp extra-virgin olive oil in a separate skillet over medium-high heat until shimmering. Add the chicken and cook for 5-6 minutes per side until golden brown and cooked through to 165°F internally. Remove and slice into thin strips.
In the same skillet, reduce heat to medium-low and add 1 tbsp soy sauce. Sprinkle in 1 cup sharp cheddar cheese and 1 cup mozzarella cheese, stirring constantly until they melt completely into a smooth sauce. This creates the rich, creamy element that balances the savory broth.
Cook the Udon and Assemble the Dish
Bring a large pot of salted water to a rolling boil and cook the 8 oz fresh udon noodles according to package instructions until al dente - typically 3-4 minutes. Drain immediately and rinse briefly under cold water to stop cooking. This prevents the noodles from becoming mushy when combined with the hot broth.
Divide the cooked udon among 4 bowls. Ladle the shitake-infused broth evenly over the noodles, then top each serving with 1/4 of the sliced chicken, 1/3 of the cheese sauce, and 1/4 of the sliced green onions. The layers should create a beautiful contrast of textures and colors.
Finish with Garnishes and Optional Heat
Toast 1 tbsp sesame seeds in a dry skillet over medium heat for 1-2 minutes until fragrant and golden. Sprinkle these over each bowl along with the remaining green onions, sliced thinly. For those who enjoy heat, drizzle with 1 tsp chili oil - just a few drops per serving is enough to add a subtle spicy kick.
The final dish should present with silky noodles floating in rich broth, melted cheese swirling through the sauce, and vibrant garnishes that add both color and texture. Serve immediately while the cheese remains melty and the broth stays warm - this dish tastes best fresh from the pot!
Pro Tips For Making Cheese Udon
- PREP SHITAKE FIRST: Soak those dried shitake in hot—not boiling—water for 10 minutes before slicing. I learned this the hard way: dry-soaking makes them chewy, and you’ll end up with a mushy mess in your broth. A quick rinse after soaking removes bitterness too.
- CUT CHEESE SMALL: Dice the sharp cheddar and mozzarella into ½-inch cubes, not thick slabs. The smaller pieces melt faster and blend into the sauce instead of sitting like lumps. Mozzarella’s stretchiness will make the udon look fancy—just don’t skip the sharp cheddar for that tangy bite.
- SAVE THE STARCH: Reserve ¼ cup of the udon cooking water before draining. The starch in it acts like a natural thickener for the cheese sauce later. I used to toss it, and the sauce always ended up watery—now I keep it in a small bowl until needed.
- LOW AND SLOW MELT: Simmer the cheese sauce on medium-low heat, stirring constantly. High heat burns the mozzarella before the cheddar melts, and you’ll end up with a grainy, separated mess. A splash of dashi powder (½ tsp) at the end brightens the whole dish—trust me, it’s not just for flavor.
Common mistakes when making perfect results
Overcooking Noodles
Udon noodles are delicate and can turn mushy if overcooked. I’ve ruined countless batches by leaving them in boiling water too long—3-4 minutes max for fresh udon. Test one noodle by biting into it: it should have a slight bite, not be soft like overcooked pasta.
Drain immediately and rinse with cold water to stop cooking. This step is critical for maintaining that perfect al dente texture that holds up when mixed with hot broth. 🍜
Skipping Broth Infusion
The dashi broth is the soul of this dish, and rushing it kills the flavor. I’ve made the mistake of adding shiitake mushrooms too late or not straining the kombu properly. Let the kombu steep for 10 minutes and the mushrooms simmer for 5 minutes to extract their full umami.
Strain out the kombu completely—its bitterness ruins the delicate balance if left in. The broth should be clear with a deep, savory aroma. 💡
Cheese Sauce Separation
Cheese sauce separating is a common issue, and it’s usually from heat or moisture. I learned the hard way that pre-shredded cheese contains anti-caking agents that add moisture. Always drain and dry pre-shredded cheese thoroughly before melting.
For the best results, use block cheddar and shred it yourself. Also, keep the heat medium-low when melting the cheese—too much heat causes it to seize up and separate. Stir constantly for a silky, cohesive sauce. 🧀
Uneven Cheese Distribution
Some bowls end up with way more cheese than others, and that’s a plating disaster. The trick is to divide the cheese sauce after it’s melted and smooth. I use a ladle to portion it evenly over each bowl of noodles.
Alternatively, spoon the sauce directly onto the udon before adding the broth—this ensures every bite gets that creamy goodness. Uneven distribution makes the dish feel inconsistent, so take your time here. ✨
Ignoring the Resting Step
This one’s a game-changer: letting the udon sit for 2-3 minutes after draining makes all the difference. I used to serve it immediately, but the noodles absorb the hot broth too quickly, turning soggy.
Resting allows the noodles to firm up slightly, so they hold their shape when the broth is poured over. It’s a small step that prevents a mushy mess. ⏳
Overlooking Garnish Timing
Adding garnishes too early can make them soggy, especially the sesame seeds and green onions. Toast the sesame seeds right before serving—they lose their crunch if added while the broth is still hot.
Slice the green onions thinly and sprinkle them on top after everything else is assembled. This keeps them vibrant and adds that fresh, bright contrast to the rich, cheesy noodles. 🌿
Nutrition facts
Frequently asked questions
Can I make this cheese udon recipe with dried udon noodles?
Yes! For dried udon, soak the noodles in hot water for 10-12 minutes until pliable, then rinse with cold water to stop cooking. The texture will be slightly firmer than fresh udon but still delicious. Fresh udon is preferred for its silky quality, but dried works perfectly when properly rehydrated.
What's the best cheese substitute for a vegan version?
Use a blend of vegan mozzarella and cashew cream cheese for the closest texture. For the sauce, melt 1/2 cup vegan butter with 1/2 cup nutritional yeast and 1/2 cup unsweetened cashew milk for a rich, creamy base. The dish will still be flavorful, though the melt won't be identical to dairy cheese.
How can I add more protein without chicken?
Try shrimp (cook for 2-3 minutes per side) or firm tofu (pan-fry until golden). For extra richness, add soft-boiled eggs or crispy bacon bits as a garnish. Each option brings a different texture—shrimp adds sweetness, tofu provides heartiness, and eggs add creaminess.
Can I prepare this dish ahead of time?
Assemble everything except the garnishes up to 2 hours ahead and refrigerate. When ready to serve, reheat the broth and cheese sauce separately, then combine with the udon just before plating. Keep the garnishes separate until serving to maintain freshness and crunch. The flavors actually improve slightly after resting!
Why did my cheese sauce get grainy?
This usually happens from moisture in pre-shredded cheese or overheating. Always use block cheese shredded yourself, and melt it over low heat while stirring constantly. If it starts to separate, whisk in 1 tsp cornstarch mixed with 1 tbsp water to smooth it out. The key is patience—rushing causes graininess.