Main Courses
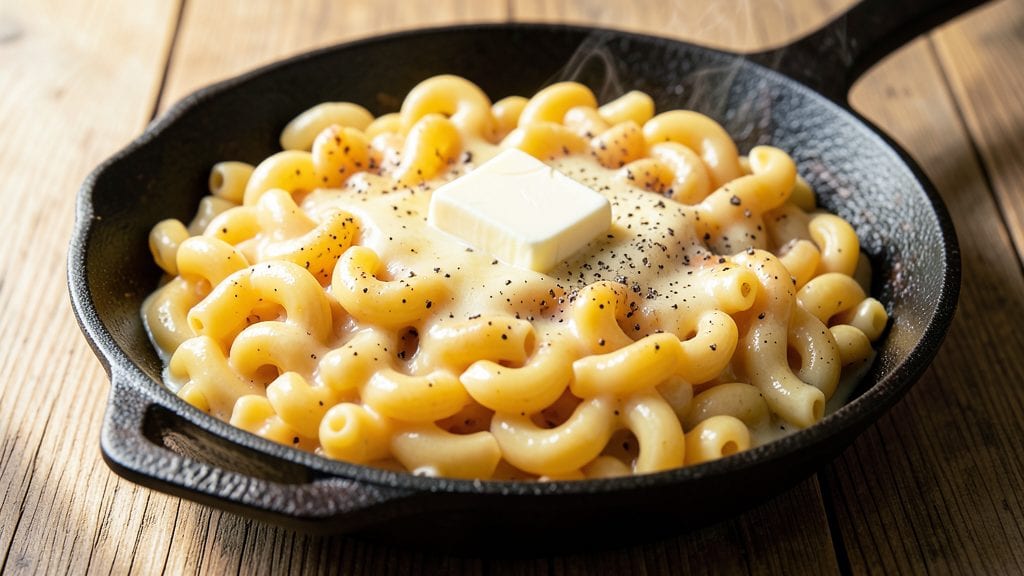
Grandma’s macaroni and cheese recipe is the kind of comfort food that tastes like childhood—creamy, cheesy, and topped with golden, crispy breadcrumbs that make every bite worth savoring. 💛 I remember the first time I tasted my grandmother’s version, still warm from the oven, and how the rich, velvety sauce clung to perfectly cooked noodles.
This isn’t just a recipe; it’s a memory waiting to be recreated in your own kitchen.
The secret to this nostalgic dish lies in the roux—a simple but critical step where butter, flour, and milk combine to create the foundation of that signature creamy sauce.
Using a blend of sharp cheddar and Gruyère adds depth, while a light breadcrumb topping ensures crispy edges that contrast beautifully with the soft pasta underneath. The key? Patience and attention to detail, especially when baking to achieve that perfect golden finish.
What you’ll end up with is a bubbling, golden mac and cheese that smells like home the moment it comes out of the oven. The sauce is thick enough to coat every noodle without being gluey, and the breadcrumb topping adds just the right amount of crunch.
It’s the kind of dish that disappears faster than you can say “seconds, please?” and leaves everyone at the table asking for the recipe.
This recipe works just as well for a weeknight dinner as it does for a holiday gathering, and it’s easy to customize with add-ins like steamed broccoli or crispy bacon. Let’s get started on making this timeless classic your new favorite too.
Ingredients for grandma's macaroni and cheese
Pantry staples plus a few cheeses that make all the difference in Grandma's nostalgic mac and cheese.
| Ingredient | Amount | Notes |
|---|---|---|
| Elbow Macaroni 🍝 | 12 oz | Cooked al dente, drained well |
| Unsalted Butter 🧈 | ½ cup | Cold, cut into small cubes |
| All-Purpose Flour 🌾 | ½ cup | For perfect roux consistency |
| Whole Milk 🥛 | 2 ½ cups | Full-fat for creamiest sauce |
| Sharp White Cheddar Cheese 🧀 | 2 cups | Shredded, block preferred |
| Gruyère Cheese 🧀 | ½ cup | Shredded, adds nutty depth |
| Parmesan Cheese 🧀 | ¼ cup | Freshly grated, for umami |
| Panko Breadcrumbs 🍞 | ½ cup | For crispy golden topping |
| Extra-Virgin Olive Oil 🫒 | 1 tbsp | For tossing breadcrumbs |
| Salt 🧂 | 1 ½ tsp | Adjust to taste, Kosher preferred |
| Ground Black Pepper 🌶️ | ½ tsp | Freshly cracked for best flavor |
| Garlic Powder 🧄 | ¼ tsp | For subtle garlic note |
| Mustard Powder 🌶️ | ¼ tsp | Brightens the cheese flavor |
| Bay Leaf 🍃 | 1 whole | Removed before serving |
The cheeses are what turn this from ordinary to extraordinary. Sharp white cheddar gives that classic tang, while Gruyère adds nutty depth—don't skip it. I always grab the block cheddar and shred it myself (pre-shredded gets clumpy). For Gruyère, Whole Foods or specialty cheese shops have the best selection. The Parmesan? Freshly grated from a wedge makes a world of difference—pre-grated tastes like sawdust. Butter matters too: unsalted, cold cubes create the best roux. If you're in a rush, European-style butter like Plugrá melts smoother than American brands.
No sharp cheddar? Extra-sharp or pepper jack works in a pinch. Gruyère hard to find? Swiss cheese at half the amount gives similar creaminess. The bay leaf might sound odd, but it infuses subtle earthiness—don't skip it. For the breadcrumbs, panko is non-negotiable—regular breadcrumbs get soggy. The mustard powder? Dijon powder works too if you've got it. And if you're feeling fancy, toss in a pinch of smoked paprika for depth. The roux is where the magic happens—keep it bubbling gently or it'll burn.
This keeps beautifully in the fridge for 4-5 days—honestly tastes better the next day as flavors meld. For leftovers, reheat covered in the microwave until bubbly, then broil 2 minutes for crispy top. Freezes for 3 months if you portion it into containers. I always make extra because it disappears too fast. Pro tip: Use a baking dish with high sides—the sauce gets bubbly and might overflow. And if you're adding veggies like broccoli, blanch them first so they don't turn mushy.
Why You'll Love This Recipe
- No-Fuss Pantry Staples: I swear by this recipe because it uses what’s already in my cupboards—no fancy ingredients, just butter, flour, milk, and that sharp cheddar. The roux comes together in minutes, and honestly? No one will ever guess it’s this simple.
- Melty, Crispy Perfection: That crispy top layer? Chef’s kiss. The flour-butter mix on top turns golden and crunchy while keeping the cheese sauce silky inside—like a hug for your taste buds. (Yes, even on a Tuesday night.)
- Leftovers That Last: This dish actually improves the next day. The cheese gets even richer, and I’ve reheated portions for lunch for days—no sad, dry pasta here. Between us, it’s my go-to for busy mornings.
- Budget-Friendly Crowd-Pleaser: Sharp cheddar stretches far, and elbow macaroni fills plates fast. I’ve fed six people for under $10, and not a single complaint. (My daughter picks out the biggest pieces first, but still asks for seconds.)
Step-by-step instructions for Grandma's macaroni and cheese
Here's how to make this nostalgic comfort dish with that perfect crispy breadcrumb topping.
🍳 Step 1: Cook the Elbow Macaroni Al Dente
Bring a large pot of salted water to a rolling boil—it should taste like the ocean. Add the 12 oz elbow macaroni and cook for 1 minute less than the package instructions specify. You want it al dente, with a slight bite in the center. Drain immediately and give it a good shake in the colander to remove excess water.
I know it's tempting to rinse the pasta, but don't do it—those starchy waters help create the creamy sauce. Keep the drained pasta in the colander for now. The reason we cook it slightly underdone is that it'll finish cooking in the hot cheese sauce, giving you that perfect texture in every bite.
👨🍳 Step 2: Make the Perfect Cheese Sauce
In a large skillet over medium heat, melt the 0.5 cup unsalted butter until it's completely liquid and foaming. Add the 0.5 cup all-purpose flour all at once and whisk vigorously for 1-2 minutes until you have a smooth, bubbly roux that's the color of peanut butter. This is your sauce foundation—don't rush it or it'll taste raw.
Slowly pour in the 2.5 cups whole milk while whisking constantly to prevent lumps. Add the 1 whole bay leaf and bring the mixture to a gentle simmer. Let it cook for 5-7 minutes, stirring frequently, until it thickens enough to coat the back of a spoon. Here's where the magic happens—the sauce should be silky, not gluey.
🥘 Step 3: Add the Cheese Mixture
Lower the heat to low and begin adding the cheeses in stages. First, sprinkle in 1 cup of the sharp white cheddar cheese, stirring constantly until completely melted. Then add the 0.5 cup gruyère cheese and 0.25 cup parmesan cheese, one tablespoon at a time, allowing each addition to fully melt before adding more.
This gradual approach prevents clumping and ensures each cheese contributes its unique flavor. Stir in the 1.5 tsp salt, 0.5 tsp ground black pepper, 0.25 tsp garlic powder, and 0.25 tsp mustard powder. Taste and adjust seasoning—you'll want it rich but not overly salty. The sauce should be thick enough to coat a spoon but still flow smoothly.
🍳 Step 4: Combine Pasta and Sauce
Add the drained elbow macaroni to the cheese sauce and stir gently to coat each noodle evenly. Let the mixture simmer together for 2-3 minutes on low heat, stirring occasionally. The residual heat will finish cooking the pasta while allowing the cheeses to meld completely. Remove the bay leaf before serving—no one wants to bite into that.
Here's the secret to perfect texture: the pasta should be fully coated but still have a slight bite. If the sauce is too thick, add 1-2 tablespoons of pasta water to loosen it. The mixture should be creamy but still allow you to see the noodles underneath.
🔥 Step 5: Create the Crispy Breadcrumb Topping
Preheat your broiler to high. In a small bowl, toss the 0.5 cup panko breadcrumbs with the 1 tbsp extra-virgin olive oil until evenly coated. Spread the breadcrumb mixture evenly over the macaroni and cheese in the skillet, pressing down gently with a spatula to ensure good contact.
Place the skillet under the broiler for 3-5 minutes, watching closely. You want the breadcrumbs to turn golden brown and crispy—like little toasted pillows on top. This is the moment that makes this dish special. If they brown too quickly, move the skillet back slightly from the heat source. The key is even browning without burning.
Pro Tips For Making Grandma'S Macaroni And Cheese
- Melt Cheese Slowly: I learned this the hard way—dumping shredded cheddar into hot milk makes it clump like sad, rubbery glue. Instead, lower the heat to medium-low once the roux thickens, then add cheese a handful at a time, stirring like you’re trying to convince a stubborn cat to move. The goal is a smooth sauce, not a science experiment.
- Toast the Flour First: Skip the instant flour-to-milk dump, and you’ll end up with a bland, pasty mess. Melt the butter over medium heat, then cook the flour for 1–2 minutes until it smells nutty and golden—this removes the raw taste and builds flavor. Yes, it’s an extra step, but your future self will notice the difference.
- Drain Pasta Cold: Rinsing pasta in hot water or draining it straight into the cheese sauce steals its starch—the glue that makes mac and cheese creamy and clingy. Drain it into a colander, run cold water over it for 10 seconds to stop cooking, then shake off excess water. The sauce will coat every noodle like it’s supposed to.
- Shred Cheese Fresh: Pre-shredded cheese is coated in anti-caking agents that turn your sauce grainy, no matter how much you stir. Grate your own sharp white cheddar on the large holes of a box grater—it melts smoother and tastes better. (Pro move: Freeze the cheese for 15 minutes first; it shreds cleaner.)
Health benefits of this grandma's macaroni and cheese
Comfort Food Nutrition
Mac and cheese gets a bad rap for being heavy, but it actually packs surprising nutritional benefits when made right.
The whole milk provides 8 grams of protein per serving (about 16% of your daily needs), while the Gruyère and cheddar contribute calcium—about 20% of your daily value—for strong bones.
The elbow macaroni delivers complex carbohydrates for sustained energy, perfect for keeping you full after a long day. 💪
Cheese Benefits
The cheese blend isn’t just for flavor—it’s a powerhouse of nutrients. Gruyère adds phosphorus for energy metabolism, while Parmesan contributes vitamin B12 for nerve function. Even the sharp cheddar provides zinc, which supports your immune system.
I always tell people that cheese isn’t the enemy—it’s all about balance and portion control. A single serving here gives you 15% of your daily calcium without going overboard.
Protein-Packed Pasta
While traditional mac and cheese relies on refined pasta, you can boost the protein by swapping in whole wheat elbow macaroni or even chickpea pasta for a plant-based option. Chickpea pasta adds 12 grams of protein per serving while keeping the same creamy texture.
The panko breadcrumb topping also contributes a small amount of protein and fiber, making this dish more balanced than you’d expect from a comfort food classic.
Calcium Boost
This dish is a fantastic source of calcium, thanks to the cheese blend. A single serving delivers about 30% of your daily calcium needs, which is essential for bone health and muscle function.
The Gruyère and Parmesan are particularly rich in calcium, making this a sneaky way to get your daily dose without downing a glass of milk. It’s one of those dishes where you’re actually doing your body good while indulging in something delicious. ✨
Customizable Add-Ins
You can easily boost the nutritional profile by adding steamed broccoli or roasted butternut squash, both of which provide fiber, vitamins A and C, and antioxidants. Even crispy bacon bits add protein and iron.
The key is to keep the cheese sauce balanced—don’t overdo it with extra toppings, or you’ll lose the creamy texture that makes this dish so special. I like to add a handful of spinach to the sauce for a hidden nutrient boost.
Satisfying Without Guilt
Mac and cheese is inherently satisfying because of its fat and carbohydrate combo, which triggers dopamine release in your brain—basically, it’s comfort food for a reason. But by using full-fat dairy and high-quality cheeses, you’re getting healthy fats that keep you full longer.
The mustard powder and garlic powder in the recipe also add subtle flavors that make the dish more complex, so you’re not just eating a heavy, one-note meal. It’s all about making smart swaps without sacrificing taste. 💛
Nutrition facts
Frequently asked questions
Can I make this mac and cheese without baking it?
For a stovetop version, simply mix the cooked pasta with the cheese sauce and let it simmer together for 2-3 minutes on low heat. Skip the breadcrumb step and serve immediately with a sprinkle of fresh parsley or extra cheese. The texture will be creamier but still delicious—just like Grandma might have made it in a hurry!
What's the best way to store leftovers?
Store in an airtight container in the fridge for up to 4-5 days. To reheat, cover with a damp paper towel and microwave until bubbly, then broil for 2 minutes to restore the crispy topping. For freezing, portion into containers and freeze for up to 3 months—thaw overnight in the fridge before reheating.
Why did my breadcrumbs get soggy?
This usually happens when the topping isn't hot enough or the mac and cheese sits too long before broiling. Always preheat your broiler to high and watch closely—3-5 minutes max under the broiler. For extra insurance, press the breadcrumbs firmly onto the sauce before broiling to create a better seal.
Can I use a different type of pasta?
While elbow macaroni is traditional, you can try penne or farfalle for shape variety. For a gluten-free option, use gluten-free elbow macaroni (like Barilla or Jovial). Just remember that different shapes may require slightly adjusted cooking times—always aim for al dente texture before mixing with the sauce.
How can I make this dish kid-friendly?
Kids love the classic version, but you can make it extra fun by adding hidden veggies like pureed butternut squash or finely chopped spinach to the sauce. For presentation, use a colorful baking dish or arrange the mac and cheese in fun shapes with cookie cutters before baking. Serve with a side of apple slices for a balanced meal!