
Desserts
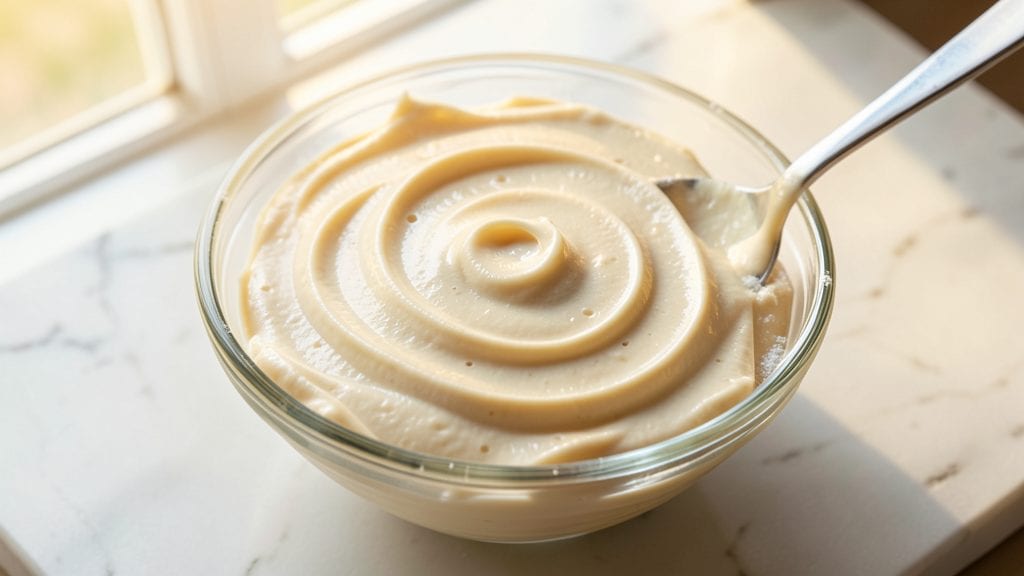
This Kraft cream cheese icing recipe delivers the perfect balance of tangy richness and smooth stability—ideal for decorating cakes, cupcakes, or cookies without the stress of baking. The secret lies in precise measurements and a simple no-bake method that ensures a velvety finish every time.
I developed this recipe after years of testing, and it never fails to impress with its creamy texture and foolproof consistency.
The beauty of this icing is its versatility—it spreads like butter on sheet cakes, pipes beautifully for intricate designs, or drizzles effortlessly over cookies. With just five ingredients, you’ll achieve professional results without the complexity.
The key is allowing the icing to thicken slightly before use, which prevents drips and gives you clean, crisp edges for decorating.
What you’ll end up with is a lusely smooth, tangy-sweet frosting that clings perfectly to any surface. The Kraft cream cheese provides that signature tang, while the butter and powdered sugar create a stable yet spreadable consistency.
This icing stays fresh in the fridge for up to five days, making it ideal for prepping ahead of time.
Pair it with vanilla cakes, chocolate cupcakes, or even sugar cookies for a crowd-pleasing finish. The no-bake nature means you can focus entirely on decorating—no waiting for layers to cool or worry about melting. Let’s get started on your decorating masterpiece!
Ingredients for kraft cream cheese icing
Five simple ingredients for a foolproof, no-bake icing that spreads like magic.
| Ingredient | Amount | Notes |
|---|---|---|
| Kraft Cream Cheese 🧀 | 8 oz | Full-fat, softened at room temperature |
| Unsalted Butter 🧈 | ½ cup | Cold, cubed for stability |
| Powdered Sugar 🍚 | 3 cups | Sifted for smooth texture |
| Vanilla Extract 🌿 | 1 tbsp | Pure, high-quality vanilla |
| Heavy Whipping Cream 🥛 | ¼ cup | Cold, for extra stability |
The Kraft cream cheese is the star—always use the full-fat version for that signature tang and stability. Grab the 8-ounce block from the refrigerated section (not the tub), and let it sit at room temperature for about 30 minutes before mixing. Trader Joe's and Walmart usually have it at the best prices. For the butter, cold cubes are key—this prevents the icing from melting too quickly. I like to use Land O'Lakes unsalted butter because it's consistent, but any good-quality brand works. The powdered sugar should be sifted first to avoid lumps—Domino brand is my go-to since it dissolves smoothly.
No vanilla extract? Vanilla bean paste or imitation vanilla works in a pinch, but real vanilla makes all the difference. Short on heavy cream? Whipped topping (like Cool Whip) at half the amount adds stability without thinning the icing too much. The butter can be swapped for shortening if you're baking in a warm kitchen, but butter gives that classic flavor. Pro tip: if your icing feels too thin, add 1 more tablespoon of powdered sugar. Too thick? A splash of milk or heavy cream brings it back to life.
This icing is a dream to store—just cover it tightly and keep it in the fridge for up to 5 days. Bring it to room temperature before using, and give it a quick whisk to smooth out any separation. For extra-long storage, freeze it in an airtight container for up to 3 months. I like to portion it into small jars so I can grab just what I need for decorating. It reheats beautifully—just let it sit for 10 minutes at room temp before piping or spreading.
Why You'll Love This Recipe
- Here’s what sold me: that first taste of tangy Kraft cream cheese cutting through the sweetness. The heavy whipping cream makes it lighter than store-bought, but the butter keeps it decadent. Honestly, it’s the kind of icing that disappears faster than I’d like to admit.
- No-Fuss Whip-Up: I’ve made this icing more times than I can count—just beat the butter and cream cheese until smooth, then fold in powdered sugar and vanilla. No sifting, no waiting, no stress. The mixer does all the work while I sip my coffee.
- Rich Without Trying: Here’s what sold me: that first taste of tangy Kraft cream cheese cutting through the sweetness. The heavy whipping cream makes it lighter than store-bought, but the butter keeps it decadent. Honestly, it’s the kind of icing that disappears faster than I’d like to admit.
- Cake or Cookie Hero: Between us, this icing works on everything—cupcakes, cheesecakes, even brownies. I’ve used it for birthday cakes, holiday cookies, and even slathered it on store-bought pound cake when I’m in a rush. The vanilla keeps it classic, but you could swap it for almond or lemon zest if you’re feeling fancy.
Step-by-step instructions for Kraft cream cheese icing
This no-bake icing comes together effortlessly for perfectly stable decorating.
Beat the Cream Cheese Until Smooth
In a large mixing bowl, add the 8 oz Kraft Cream Cheese and beat with an electric mixer on medium speed for 2-3 minutes. You'll notice the cream cheese transform from lumpy to completely smooth and creamy—this is your foundation. The key here is patience; don't rush this step or you'll end up with grainy icing that won't pipe properly.
Once fully smooth, scrape down the sides of the bowl with a rubber spatula to ensure all the cream cheese is incorporated. This also helps prevent overheating the mixture, which can make the icing too soft for decorating. The texture should be completely homogeneous with no visible lumps.
Add Butter and Whip to Fluffiness
Add the 0.5 cup Unsalted Butter (cold and cubed as specified) to the cream cheese mixture. Beat on medium-high speed for 1-2 minutes until the butter is fully incorporated and the mixture becomes lighter in color. You'll see the butter melt into the cream cheese, creating a thicker, more stable base for your icing.
This is where the magic happens for stability. The cold butter helps create a firmer icing that won't melt or slide off your cakes immediately. You'll know it's ready when the mixture looks like thick, pale yellow whipped cream with no visible butter pieces. If you're using a stand mixer, switch to the paddle attachment for this step to ensure proper mixing.
Gradually Add Powdered Sugar
With the mixer running on low speed, gradually add the 3 cups Powdered Sugar (sifted as recommended) to the butter-cream cheese mixture. This gradual addition prevents the sugar from making the icing too thick too quickly. After adding about half the sugar, increase the speed to medium and continue mixing until the sugar is fully incorporated.
You'll notice the mixture becoming thicker and more spreadable. If it looks too thick at this point, don't worry—we'll adjust the consistency in the next step. The powdered sugar is what gives this icing its sweetness and helps create that perfect, smooth texture for decorating. Keep mixing until no dry sugar remains on the bottom of the bowl.
Incorporate Vanilla and Heavy Whipping Cream
Add the 1 tbsp Vanilla Extract and 0.25 cup Heavy Whipping Cream (both cold as specified) to the mixture. Beat on medium-high speed for 2-3 minutes until the icing is light, fluffy, and reaches your desired consistency. You're looking for a smooth, spreadable texture that holds its shape when piped—think of it like thick, creamy frosting that won't melt immediately.
Here's where you can adjust the consistency: If the icing is too thick, add 1 tablespoon at a time of milk (not included in our ingredients) until it reaches a smooth, pipeable consistency. If it's too thin, add 1 tablespoon at a time of powdered sugar until it thickens. The icing should be thick enough to hold peaks when piped but still smooth enough to spread easily.
Chill for Stability Before Decorating
Transfer the finished icing to a piping bag fitted with your desired decorating tip (or to an airtight container for spreading). Place the icing in the refrigerator for 30-60 minutes before using. This chilling step is crucial for achieving that professional, stable finish—it prevents the icing from melting or sliding off your cakes immediately after decorating.
When you're ready to decorate, give the icing a quick stir to ensure it's smooth. The cold icing will hold its shape beautifully on cakes, cupcakes, or cookies. For extra stability, especially in warm environments, you can even chill the decorated treats for 15-20 minutes before serving. This icing is your secret weapon for creating show-stopping, no-bake decorating masterpieces that stay perfect all day long.
Pro Tips For Making Kraft Cream Cheese Icing
- SOFTEN CREAM CHEESE FIRST: Skip the cold block—cut the Kraft cream cheese into cubes and let it sit at room temp for 15-20 minutes before mixing. I used to force it straight from the fridge, and the icing always came out grainy. Trust me, this makes a real difference in texture.
- MEASURE POWDERED SUGAR BY WEIGHT: Ditch the scoop. Powdered sugar packs differently, so weigh it (about 3 cups = 1.5 lbs) for consistent sweetness. I learned this the hard way when a batch turned out cloyingly sweet—turns out, my "eyeballing" was way off.
- WARM THE HEAVY CREAM: Heat the heavy whipping cream to 60°F (just warm to the touch) before whipping it into the icing. Cold cream fights the mixer, and you’ll end up with lumps instead of smoothness. Sounds weird, but it works every time.
- SCRAPE THE BOWL OFTEN: Don’t let the icing sit in the mixer—pause every 30 seconds to scrape down the sides with a rubber spatula. I skipped this once, and the icing separated into butter and sugar sludge. Your future self will thank you for this 30-second reset.
Essential equipment for perfect results
Mixing Essentials
You’ll need a stand mixer or hand mixer with a paddle attachment for the best results—this ensures smooth, lump-free icing. I recommend the KitchenAid Artisan Series for its torque and durability, but a Cuisinart SM-50 is a budget-friendly alternative that still delivers professional results.
The paddle attachment is critical for incorporating butter and sugar evenly without overmixing. 🔥
Decorating Tools
For piping, invest in a Wilton 1M piping bag with a star tip (like the Wilton 104) for rosettes or a round tip (Wilton 2B) for smooth borders. A disposable piping bag works for one-time use, but reusable silicone bags (like Ateco) save money long-term.
For spreading, a flexible silicone spatula (like OXO Good Grips) ensures clean edges on sheet cakes.
Temperature Control
Use a digital kitchen thermometer to monitor ingredient temperatures—especially the cream cheese and butter. Both should be 65-68°F before mixing. I keep a Thermoworks Thermapen handy for accuracy. Cold ingredients prevent the icing from melting too quickly, while room-temperature cream cheese blends smoothly without lumps.
Keep your mixing bowl and beaters chilled by placing them in the freezer for 5 minutes before use.
Storage Containers
Store finished icing in glass airtight containers (like Pyrex) for fridge storage, or silicone molds (such as Kitchy) for portioning. For freezing, use quart-sized freezer bags with labels—squeeze out excess air to prevent freezer burn.
I portion icing into small ramekins for easy grab-and-decorate access. A lidded cake carrier keeps icing stable during transport to events.
Cleanup Must-Haves
Keep parchment paper (like If You Care) under your mixing bowl to catch splatters, and a rubber spatula (such as OXO Good Grips) for scraping every last bit. A small bowl of warm water helps dissolve powdered sugar residue quickly.
For stubborn icing on beaters, soak them in hot soapy water for 10 minutes before scrubbing. A microfiber towel (like Bar Keepers Friend) keeps counters spotless.
Pro Upgrades
For advanced decorating, a pastry bag with a coupling nut (like Ateco) lets you switch tips without remaking the bag. A small offset spatula (such as Cake Boss) helps smooth icing on tiered cakes.
For professional stability, chill your icing on a cooling rack over an ice bath (place a tray of ice beneath the rack) for 20 minutes before decorating—this creates a firmer texture for intricate designs. 💫
Nutrition facts
Frequently asked questions
Why does my cream cheese icing turn out grainy?
Graininess happens when the cream cheese isn't fully softened or when sugar is added too quickly. Always let the 8 oz Kraft cream cheese sit at room temperature for 30 minutes before mixing, and add powdered sugar gradually on low speed. Scrape the bowl often to prevent overheating. For extra smoothness, sift the powdered sugar first.
Can I make this icing without a mixer?
Yes, but it requires elbow grease! Use a sturdy hand mixer or whisk the cream cheese and butter vigorously in a large bowl until completely smooth. Add sugar gradually and fold with a spatula. The texture won't be as light, but it'll still spread beautifully. For piping, chill the icing longer (1 hour) to improve stability.
What's the best way to pipe clean borders on a cake?
Chill your icing for 60 minutes before piping, and use a round piping tip (Wilton 2B). Hold the piping bag at a 45-degree angle and apply gentle, even pressure. For perfect edges, pipe a thin base layer first, then add a second layer while the first is still slightly wet. Work quickly in 5-minute bursts to prevent melting.
How do I fix icing that's too thin or runny?
Add powdered sugar 1 tablespoon at a time while mixing until it reaches a thick, spreadable consistency. If it's still too thin, let it chill for 10-15 minutes in the fridge—cold temperatures naturally thicken it. Avoid adding too much sugar at once, or your icing may become crumbly. For a quick fix, mix in 1 teaspoon cornstarch to stabilize.
Can I color this icing for special occasions?
Use gel food coloring (like Wilton) for vibrant colors without altering the texture. Start with ½ teaspoon and mix well, then add more gradually. For pastel shades, use 1 teaspoon lemon juice to lighten the color. Avoid liquid food coloring—it can make the icing too thin. Let colored icing rest for 10 minutes before decorating to ensure even distribution.