
Appetizers
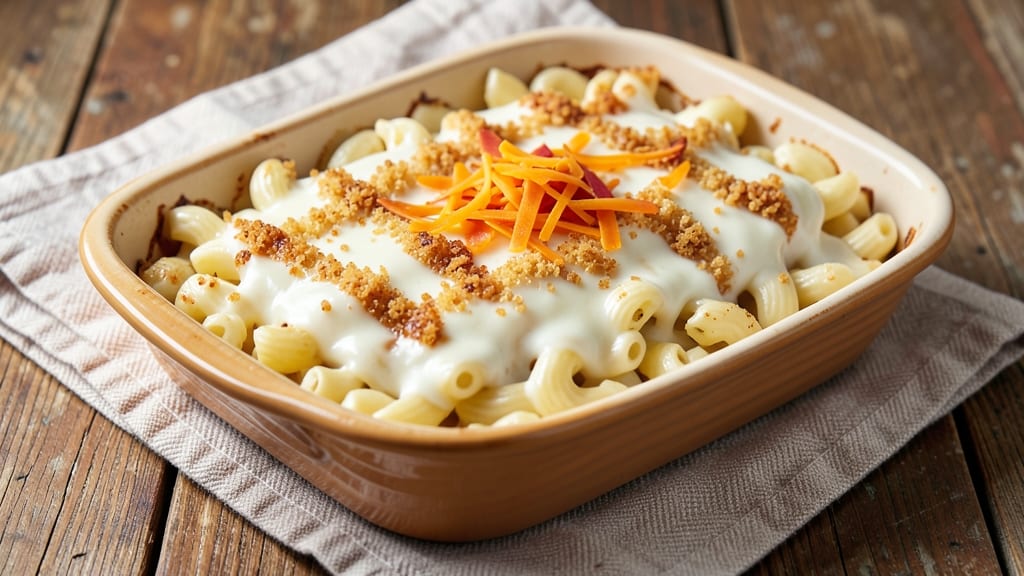
This basic Velveeta mac and cheese recipe delivers the creamy, cheesy comfort you crave with minimal effort—crispy breadcrumbs on top and a melt-in-your-mouth sauce that clings to every noodle.
The secret lies in balancing Velveeta’s smooth texture with just enough milk and butter to create a sauce that’s rich without being greasy. I’ve made this dish countless times for picky eaters and cheese lovers alike, and it never fails to disappear from the table.
The beauty of this recipe is its simplicity: five core ingredients, 30 minutes of active time, and one pot to clean. No fancy techniques required—just boil pasta, melt cheese, and top with a golden, buttery breadcrumb crust.
The Velveeta melts effortlessly, creating that signature velvety consistency, while the breadcrumbs add a satisfying crunch that contrasts perfectly with the creamy sauce.
What you’ll end up with is a restaurant-quality mac and cheese that’s foolproof enough for weeknights but impressive enough for company. The cheese sauce clings to al dente pasta, the breadcrumbs turn golden and crispy, and every bite is pure comfort.
This is the kind of dish that turns a simple dinner into a cozy, cheesy celebration—no fuss, just flavor.
Serve it as a side for steak night or as the star of a casual meal. The leftovers reheat beautifully, making it perfect for meal prep. Ready to master this classic? Let’s get cooking—your taste buds will thank you.
Ingredients for basic velveeta mac and cheese
Five simple ingredients transform into creamy, crispy mac and cheese perfection every time.
| Ingredient | Amount | Notes |
|---|---|---|
| Elbow Macaroni 🍝 | 12 oz | Al dente preferred for texture |
| Velveeta Cheese 🧀 | 1 ½ cups | Shredded or block, high-quality |
| Whole Milk 🥛 | 1 ½ cups | Full-fat for creaminess (trust me) |
| Unsalted Butter 🧈 | ½ cup | Cold, cut into small pieces |
| Panko Breadcrumbs 🍞 | ½ cup | Japanese-style for extra crunch |
| Sharp Cheddar Cheese 🧀 | ¼ cup | Shredded, for extra depth (optional) |
| Diamond Crystal Kosher Salt 🧂 | 1 ½ tsp | Adjust to taste, don't skip |
| Freshly Ground Black Pepper 🌶️ | ½ tsp | Cracked peppercorns preferred |
| Extra-Virgin Olive Oil 🫒 | 1 tbsp | For crispy breadcrumb topping |
The Velveeta is the star here—Kraft Classic is the brand I always use, but any good-quality Velveeta works. For the breadcrumbs, Panko gives that perfect crunch (the good stuff, not the pre-seasoned kind). Grab the sharp cheddar from the deli counter if you want that extra punch—it melts beautifully into the sauce. Milk matters too: whole milk keeps the sauce rich without being greasy. I buy mine in half-gallon cartons from Trader Joe's—it's cheaper and lasts longer than those little half-pints.
No Panko? Regular breadcrumbs toasted in the oven work in a pinch, but they won't be as crispy. Short on cheddar? Extra Parmesan at the end adds a nice salty kick. The butter should be cold when you add it—this keeps the sauce from separating. For a vegetarian twist, swap the milk for unsweetened almond milk**> (but add an extra tablespoon of butter to compensate). And if you're feeling fancy, add a dash of hot sauce to the sauce—trust me, it elevates everything.
This reheats beautifully—just add a splash of milk to loosen the sauce. Keeps for 4-5 days in the fridge, freezes for 3 months (portion into containers first). The breadcrumb topping gets soggy if reheated with sauce, so I always keep it separate until serving. For extra crispiness, broil the topping for 2-3 minutes right before serving—worth the extra minute.
Why You'll Love This Recipe
- Pantry Magic: I swear by this recipe because it uses stuff I always have on hand—no last-minute grocery runs. Velveeta melts like a dream, and elbow macaroni cooks in exactly the time it takes to toast the breadcrumbs. Honestly, it’s the kind of dish that saves me when I’m staring into an empty fridge at 6:30 PM.
- Creamy-Crisp Perfection: That buttery, toasted panko on top? It’s the secret weapon. The contrast between the silky Velveeta sauce and the crunchy breadcrumbs—chef’s kiss—makes every bite feel like a little comfort hug. Plus, the whole milk keeps it rich without being heavy.
- Weeknight Workhorse: Between us, this feeds a crowd or stretches into leftovers that taste just as good cold the next day. I’ve served it at potlucks, packed it for lunch, and even reheated slices straight from the fridge for a lazy Sunday. It’s the ultimate no-fuss meal that still feels special.
Step-by-step instructions for crispy Velveeta mac and cheese
Here's the method that delivers that perfect balance of creamy cheese sauce and crispy breadcrumb topping every time.
Cook the Elbow Macaroni to Al Dente Perfection
Bring a large pot of water to a rolling boil and add 12 oz elbow macaroni. Stir immediately to prevent sticking. Cook until 1 minute before the package directions specify for al dente texture—this ensures it finishes cooking in the oven without becoming mushy. The pasta should have a slight bite when you taste it, with a white center that's just beginning to form.
While the pasta cooks, prepare your saltwater properly. It should taste like the ocean—if you can't taste the salt, add more. Reserve ½ cup of pasta water before draining, as this starchy liquid is essential for creating a silky sauce. Drain the pasta and return it to the pot, tossing with a little olive oil to prevent sticking while you prepare the cheese sauce.
Create the Ultimate Velveeta Cheese Sauce
In the same pot, melt ½ cup unsalted butter over medium-low heat until it's completely liquid but not browned. Add 1.5 cups shredded Velveeta cheese and stir constantly until fully melted and smooth. The sauce should thicken slightly as it comes together, but don't let it brown or it will develop a bitter flavor.
Gradually whisk in 1.5 cups whole milk while stirring continuously. The sauce will loosen up and become creamy. Add 1.5 tsp Diamond Crystal kosher salt and ½ tsp freshly ground black pepper, then stir in ¼ cup shredded sharp cheddar cheese for that extra depth of flavor. Taste and adjust seasoning if needed—this is where the magic happens.
Combine Pasta and Cheese Sauce
Add the drained elbow macaroni to the cheese sauce and toss gently but thoroughly until every strand is completely coated. The sauce should cling to the pasta beautifully, creating that signature velvety texture. If the sauce is too thick, add a little of that reserved pasta water 1 tablespoon at a time until it reaches a smooth, pourable consistency.
Transfer the macaroni and cheese mixture to a 9x9-inch baking dish, spreading it out evenly. This even distribution ensures the breadcrumb topping will crisp perfectly and the cheese will melt uniformly. Here's the thing—don't press it down. Let it settle naturally so the cheese can melt properly and create that perfect pull-apart texture.
Create the Crispy Breadcrumb Topping
In a small bowl, combine ½ cup panko breadcrumbs with 1 tbsp extra-virgin olive oil and toss until the breadcrumbs are evenly coated. Spread this mixture evenly over the top of the macaroni and cheese, pressing down very gently with the back of a spoon. This creates a perfect barrier for crisping while allowing the cheese to melt through.
The key to crispy breadcrumbs is even heat distribution. Place the baking dish on the center rack of your oven and bake at 375°F for 15-20 minutes. You'll know it's perfect when the top is deep golden brown and the edges are crispy—almost like a little cheese bread crust. The cheese underneath should be fully melted and bubbly, with a slight pull when you lift a piece.
Rest and Serve for Maximum Creaminess
Remove the macaroni and cheese from the oven and let it rest for 5 minutes before serving. This resting time allows the cheese to set slightly, making it easier to scoop and serve without losing that perfect creamy texture. The breadcrumb topping will stay crispy while the cheese underneath maintains its luxurious meltiness.
Serve immediately while it's hot, with a side of steamed broccoli or a simple garden salad. The contrast between the crispy breadcrumb topping and the creamy cheese sauce is what makes this mac and cheese truly special. Each bite should deliver that perfect combination of textures and flavors that makes this dish so comforting and satisfying.
Pro Tips For Making Basic Velveeta Mac And Cheese
- MELT CHEESE LOW: Velveeta’s magic happens at a slow simmer—don’t rush it. If you boil the sauce, you’ll end up with a grainy, separated mess. Keep the heat at a gentle bubble, and stir often. (Yes, it’ll take 5-7 minutes, but the texture will be smooth and luxurious.)
- CUT VELEETA SMALL: I used to dump the whole block in and wonder why the sauce was lumpy. Cut it into ½-inch cubes first—this ensures it melts evenly and blends into the milk without clumps. (No one wants to bite into a surprise cheese rock.)
- DRAIN MAC DRY: After cooking the pasta, drain it and rinse it just under cold water—then shake it in the colander for 10 seconds. This removes excess starch, which prevents the sauce from turning gluey. (Trust me, your mac will hold its shape better.)
- BUTTER THE PAN: Don’t skip greasing the baking dish with butter before adding the mac and cheese. It creates a barrier so the breadcrumbs stick to the top instead of sinking into the sauce like sad, soggy crumbs. (A little extra butter here makes all the difference.)
Troubleshooting this dish
Sauce Too Thick?
If your cheese sauce is clinging to the pot like glue, don’t panic—this is easily fixed. The secret is that reserved pasta water. Add it 1 tablespoon at a time while stirring until the sauce reaches a smooth, spoonable consistency.
I’ve had this happen when the Velveeta melts too quickly, but a splash of pasta water works every time. Just don’t overdo it, or your sauce will turn watery. 💡
Cheese Not Melting Smoothly
If your Velveeta looks grainy or clumpy, you’re likely cooking it too fast. Reduce the heat to low-medium and stir constantly with a wooden spoon or silicone spatula. I’ve learned the hard way that rushing this step leads to lumps.
For extra insurance, shred the Velveeta yourself—pre-shredded cheese has anti-caking agents that can prevent smooth melting. If all else fails, strain the sauce through a fine-mesh sieve for that silky texture. 🧀
Breadcrumbs Staying Soggy
The breadcrumb topping is the star, but soggy crumbs ruin the magic. First, make sure your sauce isn’t too wet—drain excess pasta water before combining. Second, press the breadcrumbs down very gently with the back of a spoon to create a barrier.
Finally, broil for 2-3 minutes at the end for extra crispiness. Pro tip: Toast the breadcrumbs in the oven at 350°F for 5 minutes before adding them to the top—this pre-crisping makes all the difference. 🍞
Pasta Too Soft or Mushy
Overcooked pasta is the enemy of perfect mac and cheese. To avoid this, cook the pasta just 1 minute less than the package suggests, then finish it in the oven. The residual heat from the baking dish will carry it to al dente perfection.
If it’s still too soft, drain it and toss with a splash of cold water to stop the cooking process immediately. Trust me, slightly undercooked pasta holds up better than overdone noodles. 🍝
Cheese Sauce Separating
If your sauce looks oily or curdled, it’s likely because the butter melted too fast or the milk was added too quickly. To fix it, whisk in 1 tablespoon cornstarch mixed with 2 tablespoons cold milk**> until smooth, then stir over low heat until thickened.
For prevention, melt the butter slowly and whisk in the milk gradually. I also recommend using whole milk>—it’s richer and less likely to separate than reduced-fat options. 🥛
Baking Dish Not Browning Evenly
Uneven browning usually means your oven isn’t hot enough or the dish isn’t placed correctly. Rotate the baking dish halfway through baking for even heat distribution. If the edges are browning too fast, cover them loosely with aluminum foil.
I also recommend using a dark-colored baking dish>—they absorb heat better and promote even browning. And always place the dish on the middle rack for consistent results. 🔥
Nutrition facts
Frequently asked questions
Can I make this mac and cheese without baking it?
For a stovetop version, combine the cooked pasta and cheese sauce in a pot over low heat until fully melted and creamy. Stir in the breadcrumbs at the end and let them toast for 2-3 minutes until golden. The texture will be slightly softer, but still delicious—great for quick weeknight meals.
What's the best way to store leftovers?
Store in an airtight container in the fridge for up to 4-5 days. To reheat, cover with foil and warm in the oven at 350°F for 15-20 minutes until bubbly. For the crispy topping, add fresh breadcrumbs and broil for 2-3 minutes before serving. Freeze for up to 3 months by portioning into containers first.
Can I use a different type of cheese?
Velveeta is key for that signature creamy texture, but you can add ½ cup sharp cheddar or Monterey Jack for extra flavor. Avoid cheeses with high moisture content like mozzarella—they can make the sauce watery. For a smoky twist, try 2 tablespoons smoked gouda mixed into the sauce.
Why does my Velveeta sauce sometimes get grainy?
This happens when the cheese melts too fast or the heat is too high. Always melt Velveeta over low-medium heat and stir constantly. Pre-shredded cheese contains anti-caking agents that can cause graininess—shred your own for smoother results. If it happens, strain the sauce through a fine-mesh sieve for that silky texture.
How do I make this dish kid-friendly?
Keep it simple! Skip the optional cheddar if your kids prefer milder flavors. Cut the pasta into smaller pieces for little ones, and serve with a side of steamed veggies they like. For extra fun, use a cookie cutter to shape the mac and cheese into stars or hearts before baking. The crispy topping is always a hit with kids too!