
Salads
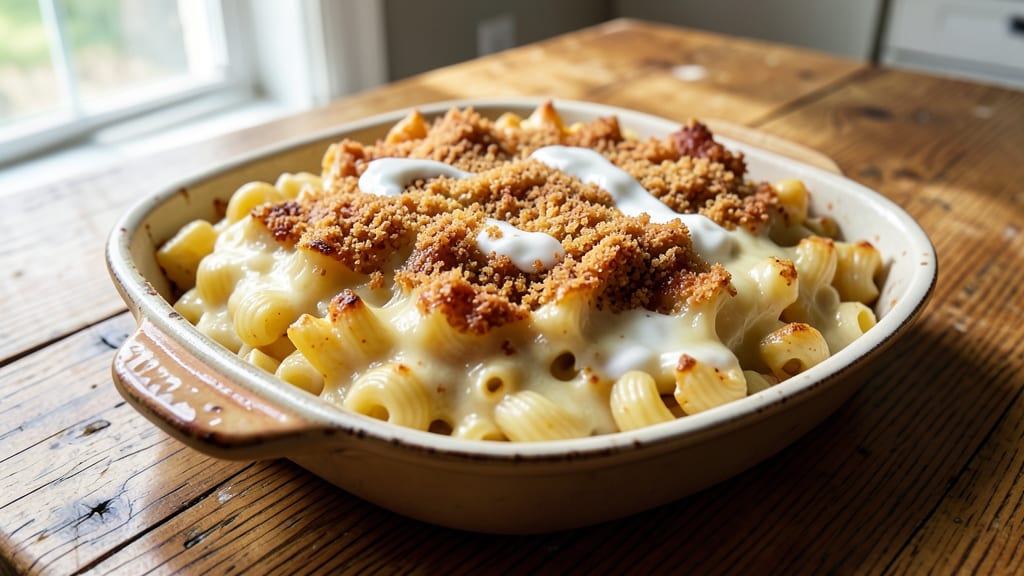
This old-fashioned baked macaroni and cheese recipe delivers the comfort food classic we all remember—crispy breadcrumbs on top of gooey, pull-apart cheese that melts in your mouth. The key lies in a proper cheese sauce made from sharp cheddar and a touch of cream, baked until bubbly and golden.
I’ve perfected this technique over years of testing, ensuring every bite hits that perfect balance of texture and flavor.
The process starts with al dente pasta cooked just right, then tossed into a velvety cheese sauce on the stovetop before baking to create that signature gooey center.
A buttery breadcrumb topping adds the crispy contrast that makes this dish unforgettable. This isn’t just mac and cheese—it’s a nostalgic, restaurant-quality meal that belongs on any dinner table.
What sets this recipe apart is the attention to detail: resting the casserole after baking ensures the cheese stays creamy, while the breadcrumbs stay crispy. The result? A dish that’s rich, satisfying, and impossible to resist.
Whether you’re feeding a family or craving a cozy meal for one, this is the mac and cheese you’ll reach for again and again.
Ready to make this classic? The ingredients are simple, but the technique ensures restaurant-quality results every time. Let’s get started—your taste buds will thank you.
Ingredients for old fashioned baked macaroni and cheese
Simple pantry staples transform into nostalgic, restaurant-quality mac and cheese with crispy contrast.
| Ingredient | Amount | Notes |
|---|---|---|
| Elbow Macaroni 🍝 | 12 oz | Al dente when cooked |
| Sharp White Cheddar Cheese 🧀 | 3 cups | Shredded, not pre-shredded |
| Medium Cheddar Cheese 🧀 | 1 cup | Shredded, sharp flavor |
| Heavy Whipping Cream 🥛 | ½ cup | Full-fat for richness |
| Unsalted Butter 🧈 | ½ cup | Cold, cubed for sauce |
| All-Purpose Flour 🌾 | ¼ cup | For roux, sifted |
| Milk 🥛 | 1 ½ cups | Whole milk preferred |
| Diamond Crystal Kosher Salt 🧂 | 1 ½ tsp | Adjust to taste |
| Ground Black Pepper 🌶️ | ½ tsp | Freshly ground |
| Garlic Powder 🧄 | ½ tsp | For subtle depth |
| Plain Dry Breadcrumbs 🍞 | ½ cup | Panko for extra crisp |
| Extra-Virgin Olive Oil 🫒 | 2 tbsp | For breadcrumb topping |
| Freshly Grated Parmesan Cheese 🧀 | ¼ cup | For topping flavor |
| Freshly Shredded Gruyère Cheese 🧀 | ½ cup | Optional for depth |
The cheddar is non-negotiable—sharp white for that classic tang, medium cheddar for creaminess. Grab a block and shred it yourself (pre-shredded gets gummy). Whole Foods or Trader Joe's carry excellent options, or look for Wisconsin cheddar if you're in the Midwest. Gruyère adds sophistication, but it's optional. The elbow macaroni should be al dente—overcooked pasta makes the dish soggy. Barilla or De Cecco are my go-tos for texture. For the breadcrumbs, Panko gives that perfect crisp, but regular dry breadcrumbs work too if that's what you've got.
No sharp cheddar? Extra sharp or pepper jack works in a pinch, but the flavor changes. Running low on Gruyère? Extra Parmesan boosts umami. The heavy cream is crucial—half-and-half makes the sauce lighter but less rich. For a dairy-free twist, unsweetened almond milk plus nutritional yeast mimics creaminess (though texture will differ). Freshly ground pepper and garlic powder are worth the extra minute—they elevate the dish without overpowering. If you're gluten-free, swap the breadcrumbs for crushed gluten-free crackers or toasted gluten-free bread.
This dish tastes even better the next day—resting 10 minutes after baking ensures the breadcrumbs stay crisp while the cheese stays gooey. Store leftovers covered in the fridge for 4-5 days, but reheat gently to avoid drying out. For make-ahead meals, assemble the casserole, cover, and refrigerate overnight before baking—the flavors meld beautifully. Freeze unbaked portions for up to 3 months—just add 10 minutes to baking time when reheating. The breadcrumb topping can be prepped ahead and stored in the freezer for up to 2 weeks.
Why You'll Love This Recipe
- No-Fuss Assembly: I swear by this recipe because it’s literally dump-and-bake. Boil the elbow macaroni, mix in the shredded cheddar (sharp for bite, medium for creaminess), stir in the butter and cream until it’s velvety—no fancy techniques, just a bowl and a whisk. Honestly, the hardest part is waiting for it to bubble.
- Cheese Overload Magic: That combo of sharp and medium cheddar? It’s dangerously good. The sharp gives a tangy punch, while the medium melts into that rich, stretchy sauce—plus, the heavy cream keeps it luscious without being greasy. (Yes, even on a Tuesday night.)
- Leftovers That Last: This dish actually improves the next day. The cheese pulls tighter, the edges get crispier when reheated, and it’s still creamy inside. I make a double batch on Sundays because it’s my go-to for lazy lunches or quick dinners—no one ever complains.
- Budget-Friendly Crowd-Pleaser: Five ingredients, zero specialty items, and it feeds a houseful. The elbow macaroni is cheap, the cheddar stretches far, and the butter/cream make it feel indulgent. Between us, this is how I feed my college-age kids without breaking the bank.
Step-by-step instructions for old fashioned baked macaroni and cheese
This method delivers that perfect balance of creamy, gooey cheese and crispy breadcrumb topping every time.
Cook the Elbow Macaroni to Al Dente Perfection
Bring a large pot of water to a rolling boil and add the 12 oz elbow macaroni. I like to use about 8 quarts of water for proper pasta expansion. Add 1.5 teaspoons diamond crystal kosher salt to the boiling water—it should taste like the ocean. Cook the pasta until it's al dente, which for elbow macaroni should be about 10-12 minutes. You'll know it's perfect when you taste a piece and it has a slight resistance in the center.
While the pasta cooks, I always keep a measuring cup nearby to reserve 1 cup of pasta water before draining. This starchy liquid is essential for creating a silky cheese sauce. Drain the pasta in a colander and set it aside for the next step. Don't rinse it—those surface starches help bind the cheese mixture.
Create the Ultimate Creamy Cheese Sauce
In a large Dutch oven or heavy-bottomed pot, melt the ½ cup unsalted butter over medium heat. Once fully melted, whisk in the ¼ cup all-purpose flour to create a roux. Cook for 2-3 minutes, stirring constantly, until the mixture turns a light golden color and smells nutty—this ensures proper thickening without any raw flour taste.
Slowly pour in the 1.5 cups milk while whisking vigorously to prevent lumps from forming. Bring the mixture to a gentle simmer and cook for 5-7 minutes until it thickens enough to coat the back of a spoon. This is your velvety base sauce. Remove from heat and reduce to medium-low before adding the 3 cups sharp white cheddar cheese and 1 cup medium cheddar cheese. Stir constantly until completely melted and smooth.
Combine Pasta and Cheese Mixture
Add the cooked elbow macaroni to the cheese sauce and stir gently to coat each piece evenly. The pasta will absorb some of the sauce, so if it looks too thick, add ¼ cup of reserved pasta water at a time until you reach a creamy consistency that clings beautifully to the pasta. Season with ½ teaspoon ground black pepper and ½ teaspoon garlic powder, then taste and adjust the 1.5 teaspoons diamond crystal kosher salt as needed.
Here's a pro tip: I like to let the mixture sit off the heat for 2-3 minutes while I prepare the topping. This allows the flavors to meld slightly and makes the final texture even more luxurious. The cheese should be smooth with no lumps, and the pasta should be completely coated in that golden, creamy sauce.
Prepare the Crispy Breadcrumb Topping
In a small bowl, combine the ½ cup plain dry breadcrumbs, 2 tablespoons extra-virgin olive oil, ¼ cup freshly grated parmesan cheese, and ½ cup freshly shredded gruyère cheese. Mix thoroughly with your fingers until the breadcrumbs are evenly coated with oil and cheese. This topping is what creates that irresistible crispy contrast against the creamy cheese.
Spread the breadcrumb mixture evenly over the macaroni and cheese in the Dutch oven. For extra crispiness, I press down gently with the back of a spoon to ensure good contact with the cheese. The breadcrumbs should form a continuous layer with no gaps—this ensures even browning when we bake it.
Bake to Golden, Crispy Perfection
Preheat your oven to 375°F while you prepare the topping. Place the Dutch oven with the topped macaroni and cheese on the middle rack and bake for 20-25 minutes. You're looking for that beautiful golden brown color on the breadcrumbs—it should be crispy enough to snap when you press it gently with tongs.
Real talk: your oven might run hot or cold, so start checking at the 20-minute mark. The cheese should be bubbling gently around the edges, and the breadcrumbs should be crispy with just a hint of golden color. If it's browning too quickly, tent loosely with foil for the last 5 minutes of baking to prevent over-browning.
Let the macaroni and cheese rest for 5-10 minutes before serving. This resting period allows the cheese to set slightly, making it easier to scoop and ensuring that first bite delivers that perfect pull-apart texture with crispy breadcrumbs on top. Serve immediately while it's hot and enjoy every gooey, cheesy bite!
Pro Tips For Making Old Fashioned Baked Macaroni And Cheese
- Cook pasta al dente: I learned this the hard way—overcooked elbow macaroni turns into mush in the oven. Pull it out when it’s just firm to the bite, then drain it immediately. The residual starch will help the sauce cling, but soggy pasta ruins everything.
- Grate cheese fresh: Pre-shredded cheese has anti-caking agents that make the sauce grainy. Use a box grater for sharp white cheddar and medium cheddar, then toss the shavings in a bit of flour to absorb moisture. Trust me, your texture will be smoother.
- Temper the cream: Dumping cold heavy cream into hot butter can cause it to seize. Warm the cream slightly (just until it’s lukewarm) before whisking it into the butter. This keeps the sauce silky instead of separating.
- Broil for the crust: Skip the broiler if you’re impatient, but it’s the only way to get that golden, bubbly top. Cover with foil for 15 minutes first, then uncover and broil for 3–5 minutes—watch it like a hawk. If it browns too fast, move the pan.
Regional styles of this dish
Southern Comfort Style
In the American South, macaroni and cheese gets a hearty twist with extra sharp cheddar and a touch of smoked Gouda for depth.
I like to add ½ cup cooked ground pork or crispy bacon bits to the cheese sauce before baking, giving it that classic "pork and beans" comfort food vibe. Serve with a side of collard greens or cornbread for an authentic Southern spread.
The key here is patience—let the casserole bake until the edges are deep golden brown for that restaurant-quality finish. 🍗
New England Crispy Top
Up north, the focus shifts to an ultra-crispy breadcrumb crust that snaps with every bite. I recommend using ½ cup panko breadcrumbs mixed with 2 tablespoons melted butter and 2 tablespoons grated Parmesan for that signature crunch.
Some New England chefs even add a sprinkle of paprika or cayenne for a subtle kick. The secret? Bake at 350°F instead of 375°F to ensure the breadcrumbs crisp without burning. This version pairs perfectly with roasted Brussels sprouts or a crisp green salad. ❄️
Midwest Homestyle
The Midwest keeps it simple but rich, often using extra sharp cheddar and a thicker cheese sauce that clings to every elbow macaroni piece. I've seen family recipes call for ½ cup cornstarch in the roux to make the sauce extra velvety.
Some versions even include a splash of whole milk at the end for added creaminess. Serve this hearty version with a crusty loaf of bread or steamed broccoli—it’s the kind of dish that fuels a cold winter day.
The breadcrumb topping here is often buttery and simple, without extra cheeses, letting the cheddar shine. 🌾
California Gourmet Twist
West Coast chefs love to elevate mac and cheese with fresh herbs and artisanal cheeses. Try swapping the breadcrumbs for a toasted almond flour crust and adding ½ cup shredded fontina or Gruyère to the cheese mix.
I like to finish with fresh thyme and a drizzle of truffle oil for a sophisticated touch. Pair this lighter version with a mixed greens salad or grilled asparagus—it’s perfect for a dinner party where you want to impress without sacrificing comfort. 🌿
Texas BBQ-Inspired
In Texas, macaroni and cheese gets a smoky, spicy kick. I love adding ½ cup cooked pulled pork or crumbled bacon to the cheese sauce, then topping it with a crunchy panko and smoked paprika mix. Some versions even include diced jalapeños or hot sauce for heat lovers.
Serve this bold dish with grilled sausages or collard greens for a full Texas-style feast. The key is balancing the smokiness with enough sharp cheddar to keep it creamy and satisfying. 🌶️
Nutrition facts
Frequently asked questions
Why does my baked macaroni and cheese get watery after baking?
Overcooked pasta or adding too much milk to the sauce are the usual culprits. Always cook pasta to al dente and use just 1.5 cups milk for this recipe. If the sauce seems too thick, add reserved pasta water (not regular water) to loosen it. Also, let the casserole rest 5-10 minutes after baking to help the cheese set properly.
Can I make this recipe ahead of time?
Assemble the casserole (without baking) and refrigerate for up to 24 hours. When ready to bake, add 10-15 extra minutes to the baking time. For freezer-friendly prep, assemble and freeze unbaked portions for up to 3 months. Thaw overnight in the fridge before baking. The flavors actually improve after resting!
What's the best way to reheat leftovers?
Reheat in 10-second bursts in the microwave, stirring between each, to avoid drying out. For oven reheating, cover with foil and bake at 350°F for 15-20 minutes until bubbly. The breadcrumbs may soften slightly, but the cheese stays creamy. Never microwave uncovered—it causes the top to rubberize.
Can I substitute pre-shredded cheese?
Pre-shredded cheese contains anti-caking agents that make the sauce gummy. For best results, always shred your own cheese using a block of sharp cheddar. If you must use pre-shredded, drain it thoroughly and add 1 extra tablespoon of flour to the roux to help absorb moisture.
How do I make this gluten-free?
Use gluten-free elbow macaroni and replace breadcrumbs with crushed gluten-free crackers or toasted gluten-free bread mixed with olive oil. For the roux, use a gluten-free flour blend like Bob's Red Mill 1:1. The texture will differ slightly, but the creamy cheese base remains delicious. Always check labels for hidden gluten.