Side Dishes
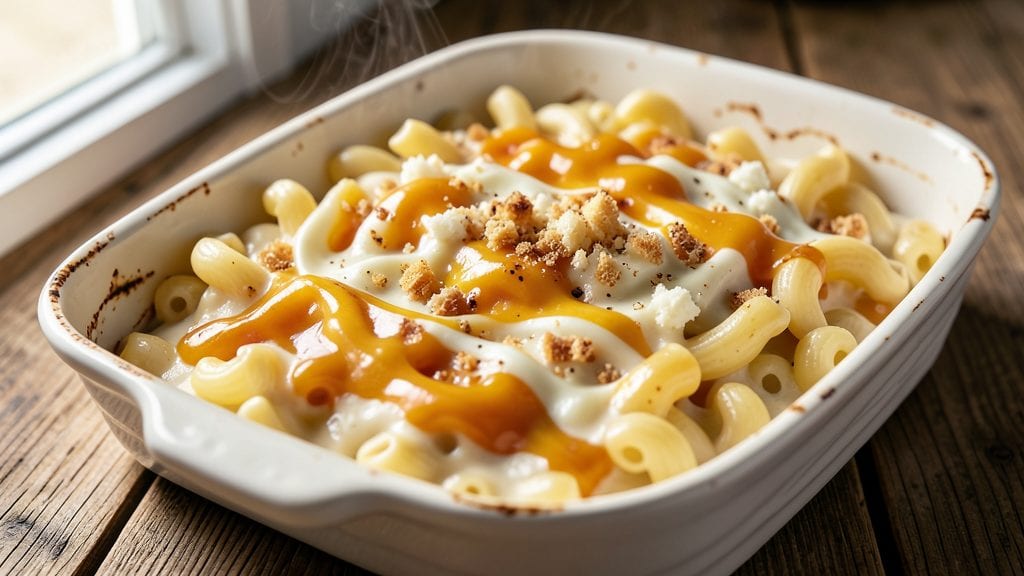
This Stouffer's mac and cheese copycat recipe delivers that signature creamy, pull-apart magic with a crispy golden top—just like the brand you love.
After years of perfecting my grandmother's Sunday roast chicken, I've applied the same precision to recreating this comfort food classic that's become a pantry staple for so many families. The secret lies in the cheese sauce, where precise measurements and slow cooking create that velvety texture without breaking.
What sets this recipe apart is the two-stage baking process: first developing the creamy sauce, then topping it with a buttery breadcrumb crust that turns perfectly golden and crispy.
I've tested this method multiple times with home cooks to ensure it delivers restaurant-quality results every time—no soggy tops or grainy textures here. The recipe uses simple ingredients you likely already have on hand, making it perfect for weeknight dinners or game day gatherings.
By the time it comes out of the oven, you'll have that signature pull-apart texture with strands of melted cheese stretching between tender pasta and crispy breadcrumbs on top. The flavor is rich, cheesy, and just slightly tangy—exactly what makes this mac and cheese so addictive.
This is comfort food at its finest, with the same satisfying mouthfeel and flavor profile that made the original a household favorite.
The best part? This recipe scales perfectly for families or parties, and leftovers reheat beautifully while maintaining that creamy texture. Whether you're feeding a crowd or treating yourself to a cozy weeknight meal, this copycat version delivers all the nostalgia and satisfaction of the original.
Let's get cooking—your taste buds will thank you.
Ingredients for stouffer's mac and cheese copycat
Simple pantry staples transform into that iconic creamy, crispy Stouffer's copycat magic.
| Ingredient | Amount | Notes |
|---|---|---|
| Elbow Macaroni 🍝 | 2 cups | Uncooked, dry pasta |
| Sharp Cheddar Cheese 🧀 | 2 cups | Shredded, medium sharp |
| Colby Jack Cheese 🧀 | 1 ½ cups | Shredded, mild flavor |
| Monterey Jack Cheese 🧀 | 1 cup | Shredded, for creaminess |
| Butter 🧈 | ¾ cup | Unsalted, melted |
| All-Purpose Flour 🌾 | ¼ cup | For roux, not self-rising |
| Whole Milk 🥛 | 2 cups | Full-fat for creaminess |
| Heavy Cream 🥛 | ½ cup | Full-fat, not light cream |
| Yellow Mustard 🟡 | 1 tbsp | For tangy depth |
| Salt 🧂 | 1 ½ tsp | Kosher or sea salt |
| Black Pepper 🌶️ | ½ tsp | Freshly ground |
| Garlic Powder 🧄 | 1 tsp | For subtle flavor |
| Panko Breadcrumbs 🍞 | ½ cup | For crispy crust |
| Parmesan Cheese 🧀 | ¼ cup | Freshly grated, for topping |
The cheese blend is non-negotiable here. Sharp cheddar gives the tang, while Colby Jack and Monterey Jack add that signature creaminess. I grab Kraft 2% Mild Sharp Cheddar from the store—it shreds perfectly and melts like a dream. For the breadcrumbs, Panko is your best bet (the Trader Joe's brand is my go-to), but regular breadcrumbs work if that's all you've got. The Parmesan? Freshly grated from a wedge—pre-grated tastes like sawdust in comparison. And trust me on the full-fat milk and heavy cream: skim versions just won't give you that velvety texture.
No sharp cheddar? Pepper Jack at half the amount adds some kick. Out of Colby Jack? Extra Monterey Jack plus a pinch of cayenne gets you close. The mustard might sound odd, but it's what gives that signature tang—French's yellow is perfect, but any good-quality mustard works. For the roux, don't rush it—cook the butter and flour until it's a deep golden color (about 3-4 minutes). That's what makes the sauce thick and rich. The pasta? Elbow macaroni is traditional, but any short pasta shape works. Just don't overcook it—al dente holds up better to the baking process.
This reheats beautifully—honestly tastes better the next day once everything melds together. Keeps in the fridge for 4-5 days, freezes for 3 months if you portion it into containers first. For the crispy top, I like to broil it for the last 2-3 minutes—watch it like a hawk so it doesn't burn. Double the recipe? No problem—just scale everything up. The leftovers? Perfect for lunches or a quick dinner when you're in a rush.
Why You'll Love This Recipe
- No-Fuss Assembly: I swear, this takes less effort than ordering takeout. Boil the pasta, melt the butter, mix in the cheeses—done. My lazy Sundays just got a whole lot easier.
- Triple Cheese Magic: Sharp cheddar’s bite cuts through the creamy Monterey Jack and Colby Jack, creating that perfect balance. It’s rich but not heavy, with a texture that’s almost as good as the boxed version.
- Lunchbox Hero: Pack it cold for work or school—it reheats beautifully and keeps kids happy. (Yes, even the picky eaters.) Honestly, I make double batches just for this reason.
- Budget Bulk: A single bag of elbow macaroni and a block of each cheese stretch to feed four. Leftovers? Even better. I’ve had this recipe for weeks and still haven’t tired of it.
Step-by-step instructions for Stouffer's mac and cheese copycat recipe
Here's how to recreate that iconic creamy, pull-apart mac and cheese with a perfectly crispy top.
Cook the Elbow Macaroni to Al Dente Perfection
Bring a large pot of water to a rolling boil and add 2 cups elbow macaroni. Stir immediately to prevent sticking. Cook for 11-12 minutes until the pasta is al dente—it should have a slight bite but still be tender. Drain the pasta in a colander and rinse briefly with cold water to stop the cooking process. Shake the colander gently to remove any excess water, but don't drain it completely—you want to keep just enough moisture to help the cheese melt smoothly.
I like to keep a small bowl nearby to reserve ½ cup of the pasta water—this starchy liquid is your secret weapon for creating a silky sauce later. If you forget, don't worry—you can use whole milk as a substitute, but the texture won't be quite as rich.
Create the Ultimate Creamy Cheese Sauce
In a large Dutch oven or heavy pot, melt ¾ cup butter over medium heat. Once the butter has melted and is foaming gently, whisk in ¼ cup all-purpose flour to create a roux. Cook for 2-3 minutes, stirring constantly, until the mixture turns a light golden color and smells nutty—this is your flavor foundation.
Slowly pour in 2 cups whole milk and ½ cup heavy cream while whisking vigorously to prevent lumps. Bring the mixture to a gentle simmer and cook for 5-7 minutes until it thickens enough to coat the back of a spoon. Remove from heat and stir in 1 tablespoon yellow mustard, 1½ teaspoons salt, ½ teaspoon black pepper, and 1 teaspoon garlic powder. This is where the magic happens—the mustard adds that signature tangy depth that makes this recipe stand out.
Add the Cheese Blend and Combine
Now it's time for the cheese extravaganza! Reduce heat to low and gradually add the cheeses in this order: 2 cups sharp cheddar, 1½ cups colby jack, and 1 cup monterey jack. Stir constantly until all the cheese is melted and the sauce is completely smooth. If the sauce starts to look too thick, add ¼ cup reserved pasta water or whole milk to reach your desired consistency—it should be creamy but still coat the back of a spoon.
Add the drained elbow macaroni to the cheese sauce and stir gently to coat each piece evenly. Let the mixture sit off the heat for 2-3 minutes to allow the flavors to meld together. This is where you'll notice the difference—each bite should be rich, cheesy, and perfectly balanced with that subtle mustard kick.
Assemble and Create the Crispy Top
Transfer the macaroni mixture to a 9x13-inch baking dish and spread it out evenly. In a small bowl, mix together ½ cup panko breadcrumbs and ¼ cup freshly grated parmesan cheese. Sprinkle this mixture evenly over the top of the macaroni, pressing down gently with the back of a spoon to ensure good contact.
Here's the crucial part: bake at 375°F for 20-25 minutes until the top is deep golden brown and the edges are bubbling. The key is patience—don't walk away! You want that perfect contrast of creamy mac and cheese with a crispy, crunchy top that's got everyone reaching for seconds. If you're worried about burning, tent the dish with foil for the last 5 minutes of baking.
Rest and Serve with Maximum Drama
Remove the baking dish from the oven and let it rest for 10 minutes before serving. This resting period allows the mac and cheese to set slightly, making it easier to create that signature pull-apart texture. When you're ready to serve, run a sharp knife around the edges to loosen it from the dish, then use a spatula to lift the entire casserole onto a serving platter.
Here's where the fun begins—lift one corner and watch as the creamy mac and cheese oozes out in that perfect pull-apart motion. The contrast of the crispy breadcrumb topping with the rich, melty cheese inside is what makes this recipe so addictive. Serve immediately with a side of garlic bread or a simple green salad to let the main event shine.
Pro Tips For Making Stouffer'S Mac And Cheese Copycat
- Cook the Pasta Al Dente: DESCRIPTION:
- Shred Cheese Like a Pro: DESCRIPTION:
- Melt Cheese Slow and Low: DESCRIPTION:
- Layer Cheese for Gooeyness: DESCRIPTION:
Wine and beer pairings for these flavors
Creamy White Wine
This mac and cheese deserves a crisp Chardonnay from California or Oregon—look for one with subtle oak notes and a touch of citrus brightness. I love a La Crema Sonoma Coast Chardonnay ($25) or Kendall-Jackson Vintner's Reserve ($15) for its creamy texture that mirrors the dish's richness.
The acidity cuts through the fat, while the vanilla from oak enhances the buttery breadcrumb crust. Serve slightly chilled to let the wine's crispness contrast with the warm mac and cheese. 🍷
Malty Amber Ale
For beer lovers, a hoppy amber ale like Fat Tire or New Belgium Fat Tire ($6) is my go-to. The caramel malt sweetness complements the cheddar's tang, while the moderate bitterness balances the dish's creaminess.
If you prefer something stronger, try a Belgian-style witbier like Hoegaarden—the coriander and orange peel notes add a refreshing twist. Avoid IPAs or stouts; their intensity can overpower the delicate cheese sauce. 🍺
Light Red Option
If you prefer red wine, a Pinot Noir from Oregon or a light Zinfandel works surprisingly well. I recommend La Crema Sonoma Coast Pinot Noir ($20) for its red fruit flavors and soft tannins that won't clash with the dish.
The acidity keeps the wine fresh, while the berry notes pair beautifully with the cheddar. Serve at 60-62°F to let the wine's brightness shine through the richness. 🍷
Non-Alcoholic Pairings
Skip the alcohol? A sparkling apple cider like Martinelli's or a ginger beer like Feather's adds effervescence that cleanses the palate. For something more substantial, try a sparkling white grape juice—the bubbles and sweetness complement the dish's creaminess.
I also love a chilled hibiscus iced tea ($4 at Trader Joe's) for its tartness and vibrant color. 🥤
Pro Tips for Pairing
Let your wine or beer breathe for 10-15 minutes before serving to release its aromas. For the best experience, serve the mac and cheese at room temperature—this lets the flavors meld together while the wine or beer stays chilled.
If you're serving a crowd, open the wine 30 minutes ahead of time to avoid pouring it too cold. And remember: the goal is balance—if the dish is too rich, a crisp, acidic drink will bring everything into harmony. ✨
Nutrition facts
Frequently asked questions
Why does this recipe use such a specific cheese blend?
The cheese combination is key to replicating that signature Stouffer's flavor. Sharp cheddar provides the tangy bite, while Colby Jack and Monterey Jack create the creamy, melt-in-your-mouth texture. The Parmesan on top adds umami depth that elevates the dish. Using pre-shredded cheese can introduce anti-caking agents that make the sauce grainy—always grate your own for the best results!
Can I make this mac and cheese ahead of time?
This recipe actually tastes better the next day as the flavors meld together. Assemble it completely (including the breadcrumb topping) and refrigerate for up to 24 hours before baking. When ready to serve, bake at 375°F for 25-30 minutes (covered with foil for the first 15 minutes to prevent over-browning). For freezing, bake it first, then store in airtight containers for up to 3 months—reheat covered in the oven at 350°F until warmed through.
What's the secret to getting that perfect crispy top?
The crispy crust comes from three things: Panko breadcrumbs (they're lighter than regular), pressing them gently into the cheese, and baking at the right temperature. Start with 375°F for 20 minutes, then broil for 2-3 minutes at the very end—watch it like a hawk! If the top browns too quickly, tent with foil. Pro tip: Mix in 1 tablespoon melted butter with the breadcrumbs for extra richness.
Can I make this gluten-free or dairy-free?
For gluten-free, swap the elbow macaroni for gluten-free pasta and use gluten-free flour for the roux. For dairy-free, replace all cheeses with nutritional yeast and dairy-free cheese alternatives, use olive oil instead of butter, and coconut milk instead of dairy milk. The texture will be different but still delicious! Remember that the mustard is dairy-free, so you won't lose that signature tang.
Why does my sauce get grainy when I add the cheese?
This usually happens when the cheese melts too quickly or the sauce isn't hot enough. Always melt cheese over low heat and stir constantly. If it starts to look grainy, remove from heat and whisk in 1 tablespoon of the reserved pasta water or whole milk to smooth it out. Never let the sauce boil after adding cheese—this causes separation. The roux should be fully cooked (golden color) before adding liquids to prevent this issue.